In this blog I discuss a few steps on how to add an external user to the SPO site and how can we access a document/file by using an external user.
External users are not a part of an organization, so we can’t add them to Site Permissions directly. We must follow the below steps so we can allow these external users to access a site or file from the SharePoint site.
Please follow this step-by-step tutorial to configure settings so that an external user can access a document/file present inside the SPO site.
Step 1
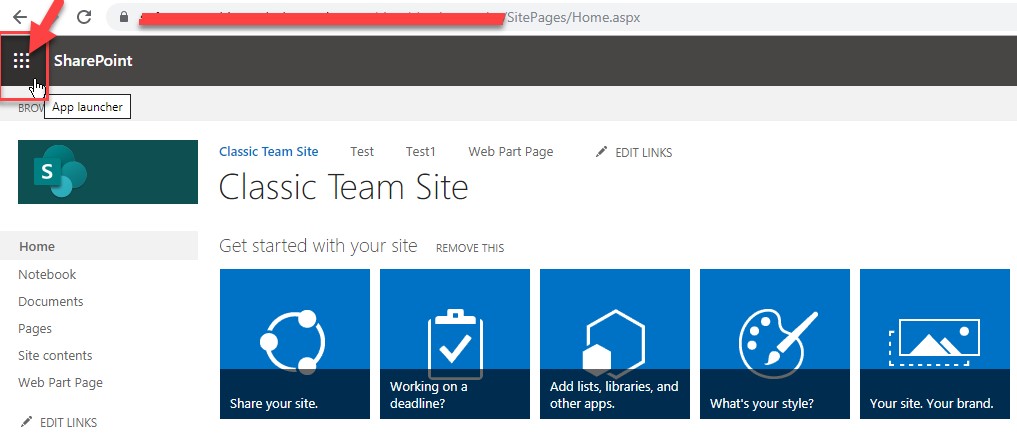
Open the SPO site where you want to add the ‘External’ user and click on the ‘App launcher’ button on top-left as marked in the below screenshot.
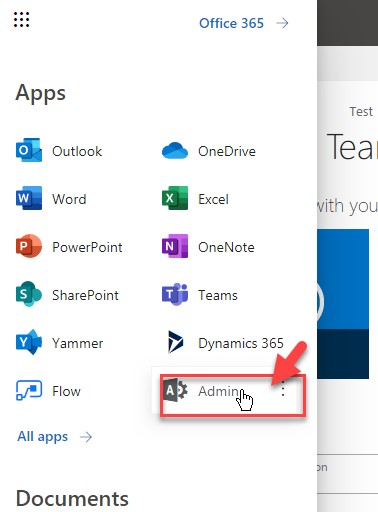
Step 2
One Popup will open. Please click on the ‘Admin’ tab as shown in the below screenshot.
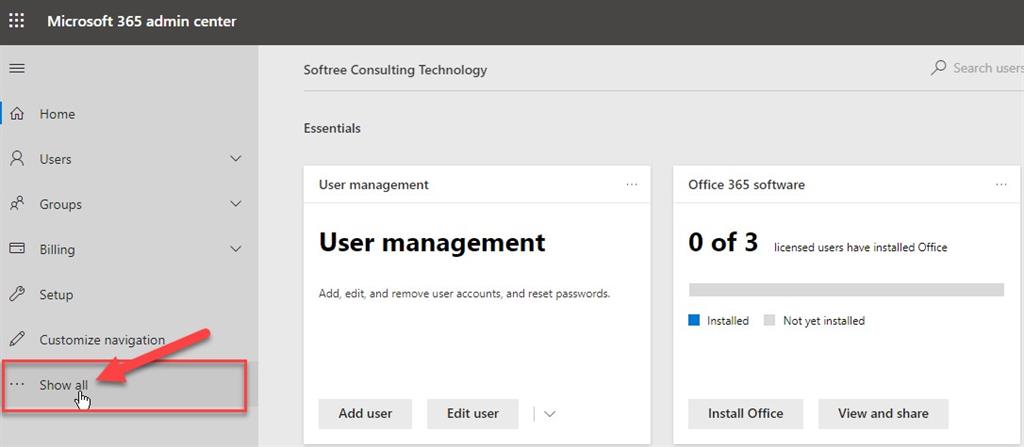
Step 3
You can see a ‘Show all’ button. Please click on it as marked in the below image.
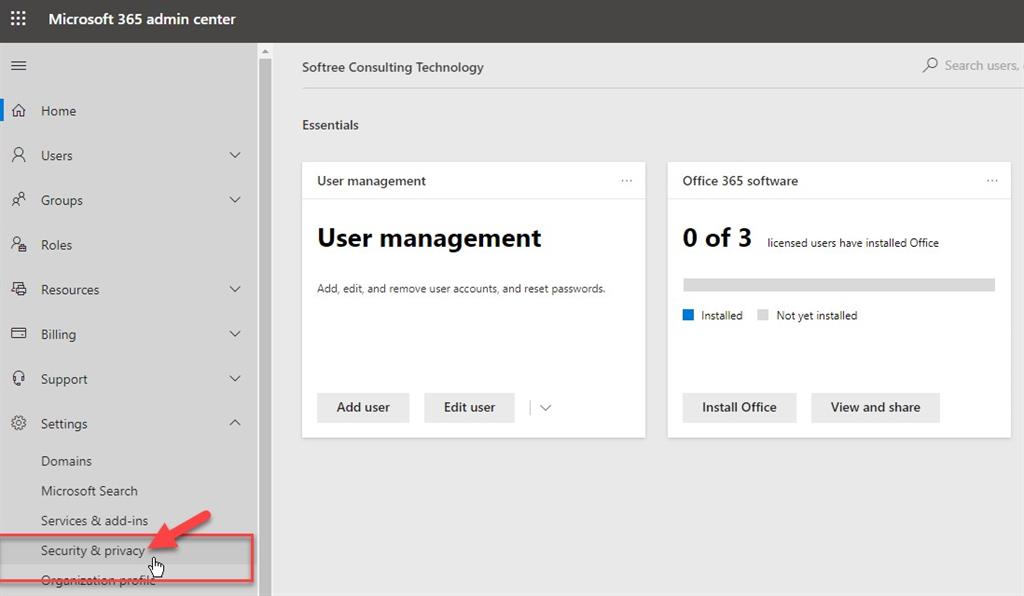
Step 4
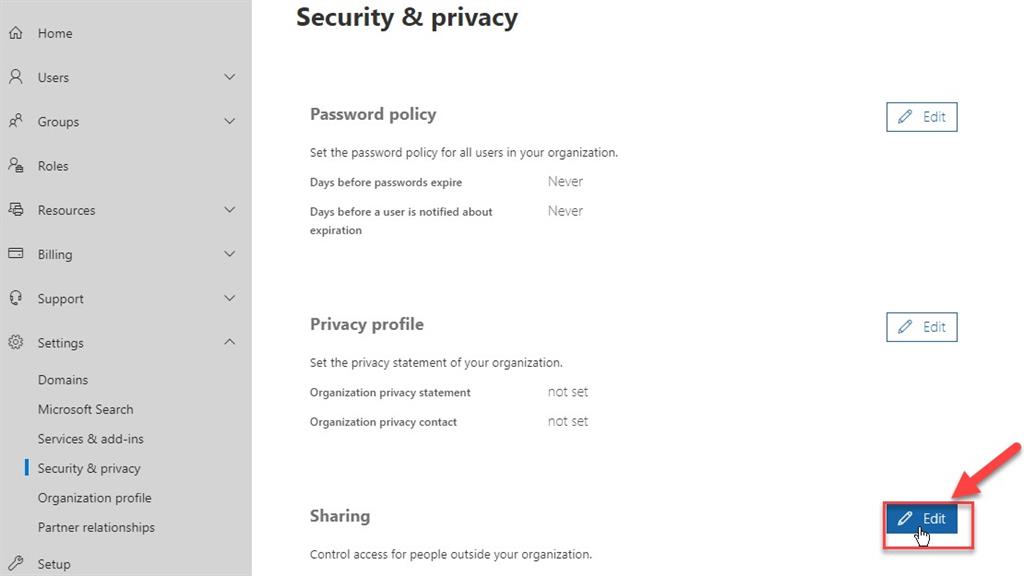
Then, click on the ‘Security & Privacy’ button as marked below.
Step 5
Please click on the ‘Edit’ button under the ‘Sharing’ tab as marked on the following screenshot.
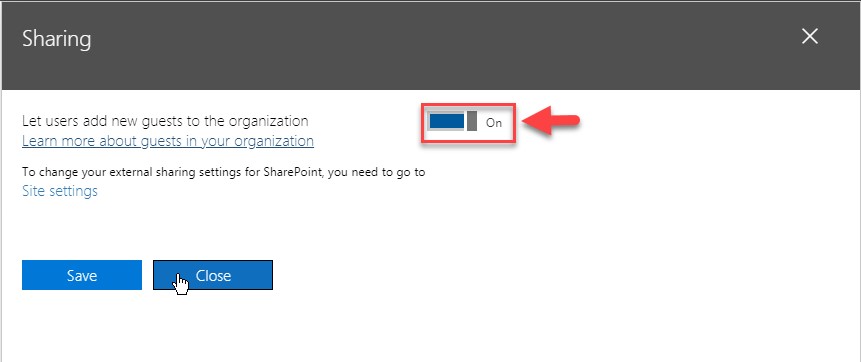
Step 6
Then please turn on the ‘Lets users add new guests to the organization’ option and please click on the ‘Save’ button as mentioned below.
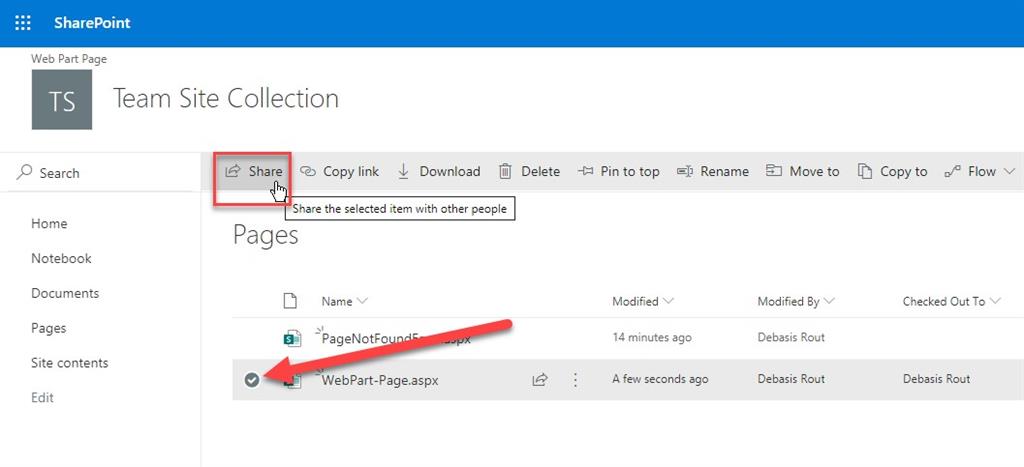
Step 7
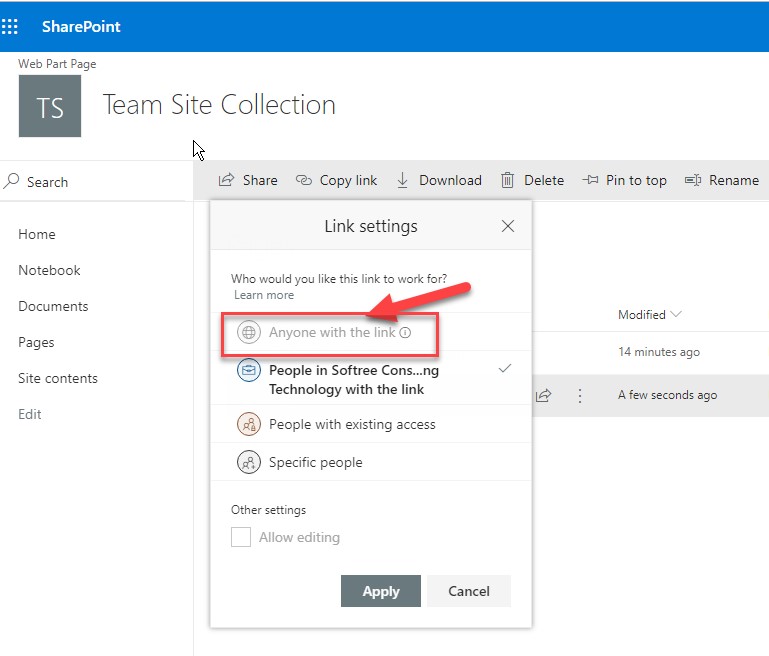
Please select any document from the above Site Collection that you want to share externally. Then, please click on the ‘Share’ option as marked below. Then, please follow the step mentioned in ‘Image – 8’.
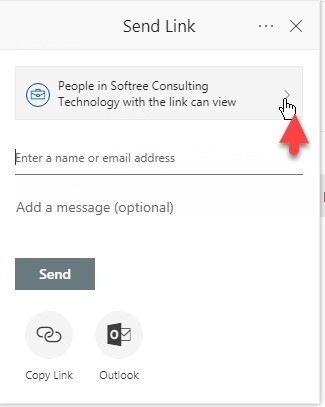
Step 8
You can see that the option ‘Anyone with the link’ option is disabled. To enable this option, we must follow the below steps.
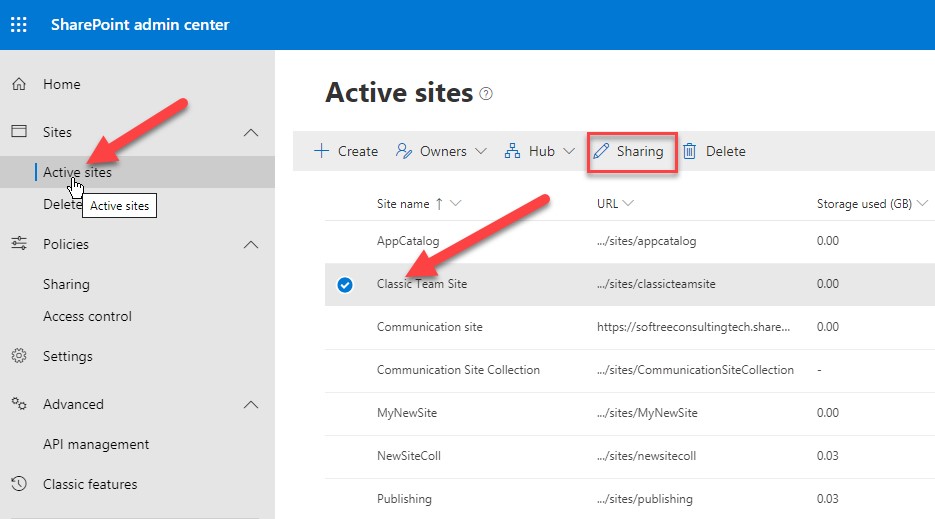
Step 9
Then please go to the ‘SharePoint Admin Center’ and click on the ‘Active sites’ button. Select the site collection where you want to add the external user and click on the ‘Sharing’ option that is marked in the below image.
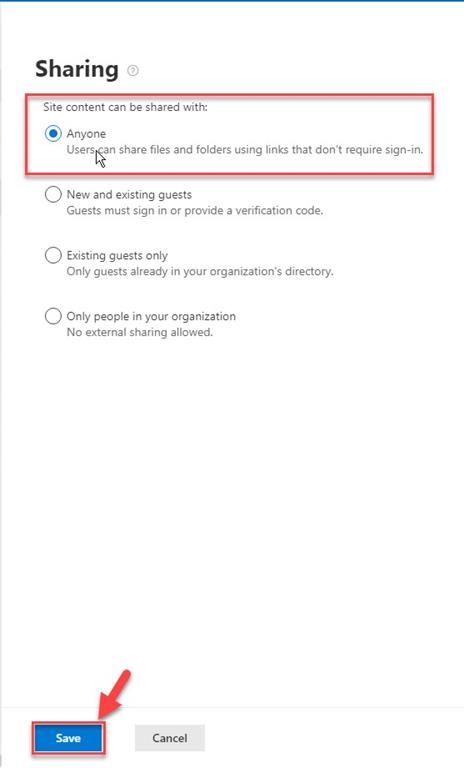
Step 10
Select the ‘Anyone’ option from the list. It enables ‘Anyone with the link’ option for the selected Site Collection.
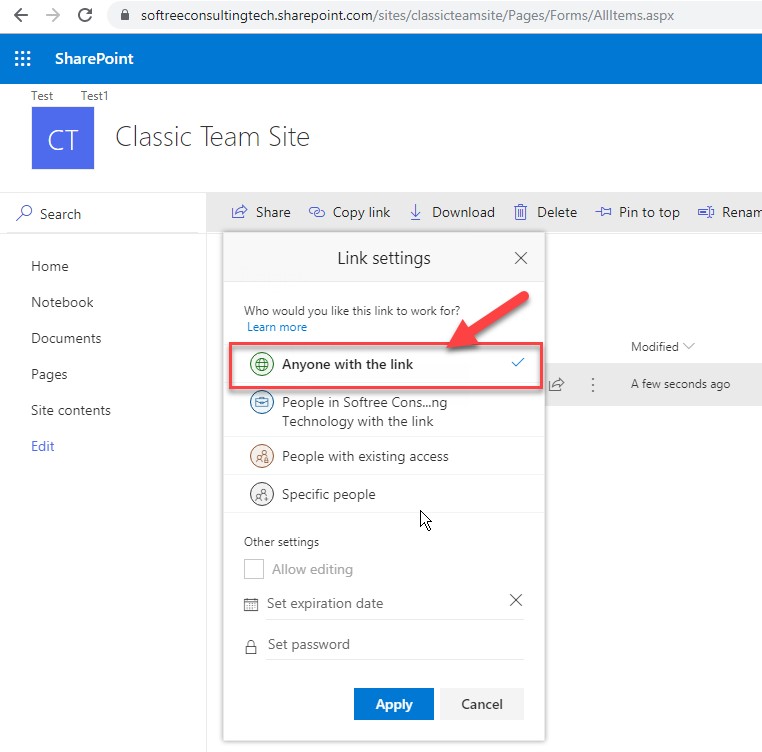
Step 11
Please select the item that we previously selected and click on the share button. You can see the ‘Anyone with the link’ option is enabled now.
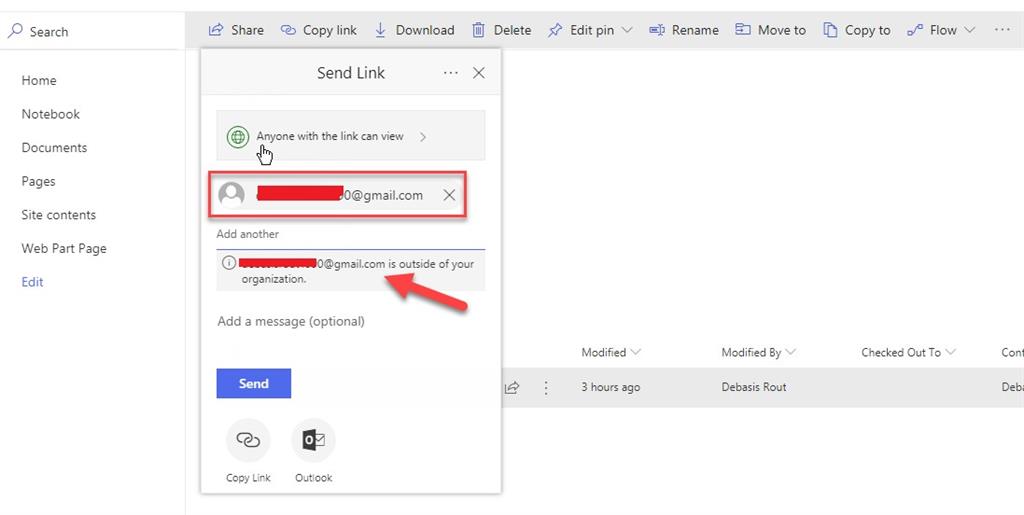
Step 12
Click on the ‘Anyone with the link’ button and enter an external user account as I have added in the below screenshot.
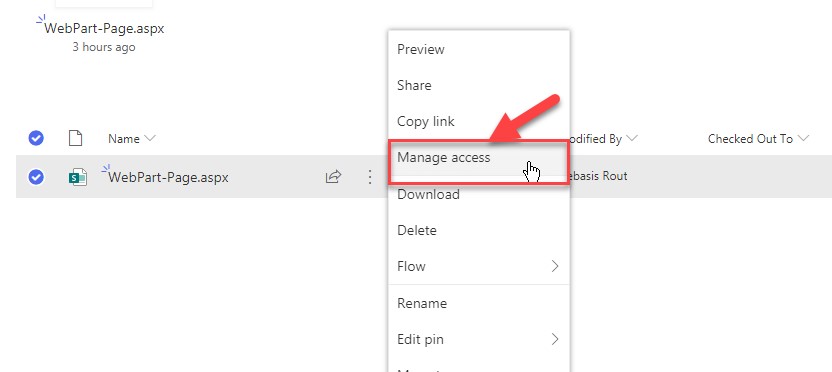
Step 13
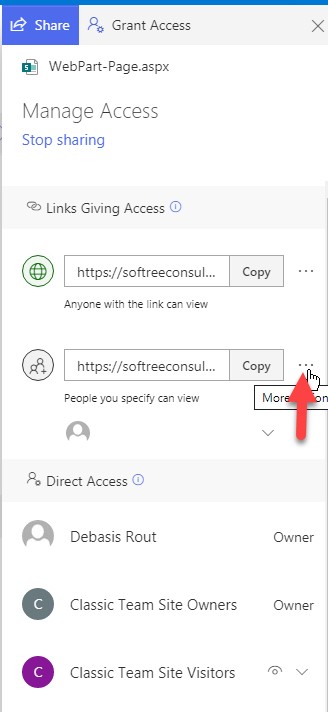
Then, please select the same document and click on the ‘Manage Access’ button mentioned in the below image. Follow the steps as mentioned in the following screenshot and you can view the external users who can access that specified document.
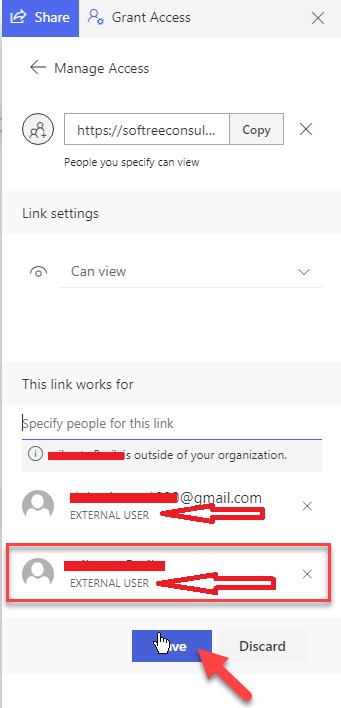
You see the users which I have added recently are shown as ‘External User’ in the above image.
Conclusion:
Please follow all the above steps to access the file/document using an external user.