Introduction:
One of our clients has a requirement to convert SharePoint Site Pages into high-quality PDF documents. They seek a solution that delivers a superior output compared to the default Ctrl + P print option, ensuring that the page’s formatting, layout, and structure are accurately preserved. The resulting PDFs should maintain all content, including text, images, margins, and styling, while offering a professional, polished appearance that is suitable for sharing and archiving.
To address this, we developed an Application Customizer in SharePoint Framework (SPFx) designed to enhance the user experience by enabling seamless PDF generation. This implementation involves capturing the content of the SharePoint page, applying custom styles (such as margins, font size, and font family), and converting it into a well-structured PDF using html2canvas and jsPDF. The solution ensures that the output is both readable and visually consistent, making it ready for distribution.
Moreover, the solution identifies divider elements within the page to logically split the content into sections, guaranteeing that the PDF maintains a structured layout and preventing content from being cut off improperly across pages.
Once generated, the PDF is automatically uploaded to a specified SharePoint document library for easy access, enabling users to efficiently retrieve and share the document.
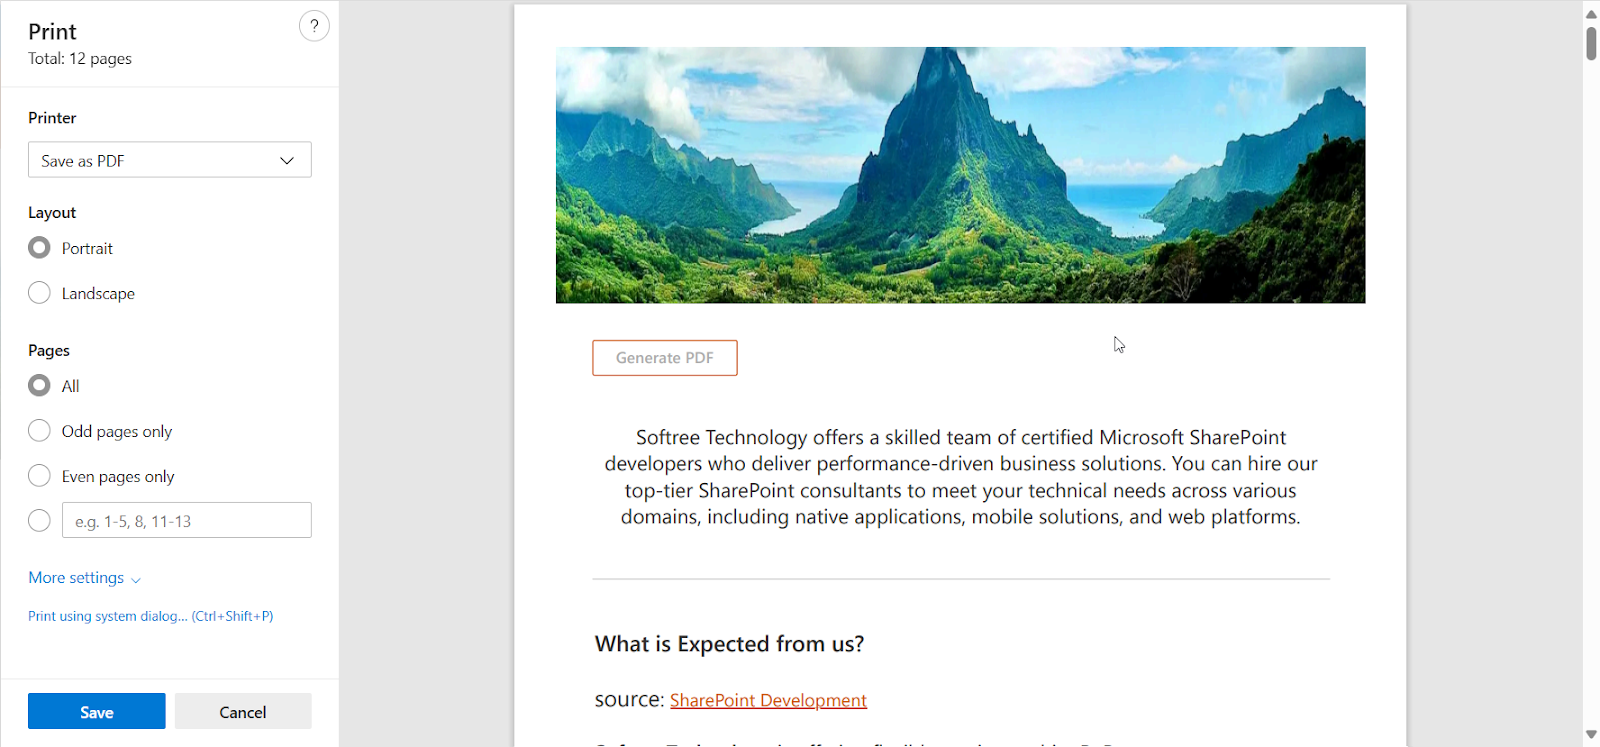
In the screenshots below, the client attempted to generate a PDF using the Ctrl + P option on Site Pages. However, they are seeking a solution that provides higher quality output, with better formatting, layout, and overall presentation than the default print method.
Technology Used:
1. SharePoint Framework (SPFx) – Application Customizer
- Injects custom logic and UI components into SharePoint site pages.
- Ensures integration without modifying master pages.
2. React + ReactDOM
- Renders the PDF button (CreatePdfPanel) dynamically into the footer.
- Provides an interactive UI for user-friendly PDF generation.
3. SharePoint REST API + SPHttpClient
- Fetches document libraries dynamically.
- Uploads generated PDFs to SharePoint.
4. html2canvas + jsPDF
- html2canvas captures page content as an image.
- jsPDF compiles the captured content into a multi-page PDF file.
5. TypeScript + JavaScript
- Ensures strong typing and maintainability in SPFx.
- Uses DOM manipulation (document.querySelector, document.createElement) for injecting UI components.
6. Office UI Fabric/Fluent UI: To build uniformity in designing the UI components.
Output Screenshots:
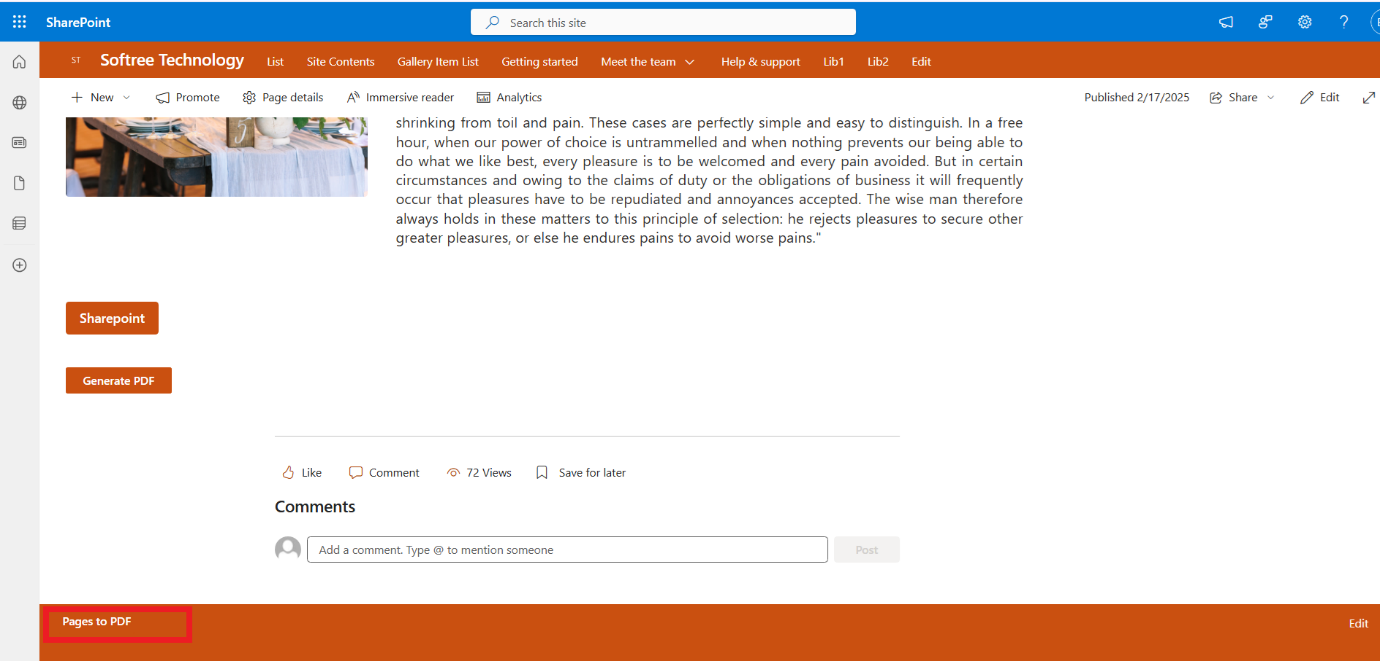
The “Pages to PDF” button in the footer is displayed only if the user has Full Control permissions . This ensures that only authorized users can access the functionality to generate a PDF from SharePoint pages and upload it to a document library. If the user does not have Full Control, the button remains hidden, preventing unauthorized access to the feature.
A Dropdown component allows users to select a SharePoint document library where the generated PDF will be uploaded. The available libraries are dynamically fetched and presented as selectable options. When expanded, the dropdown displays the list of available document libraries, enabling users to choose the desired destination for the uploaded PDF.
The button becomes disabled and will not trigger the PDF generation if no library is selected .
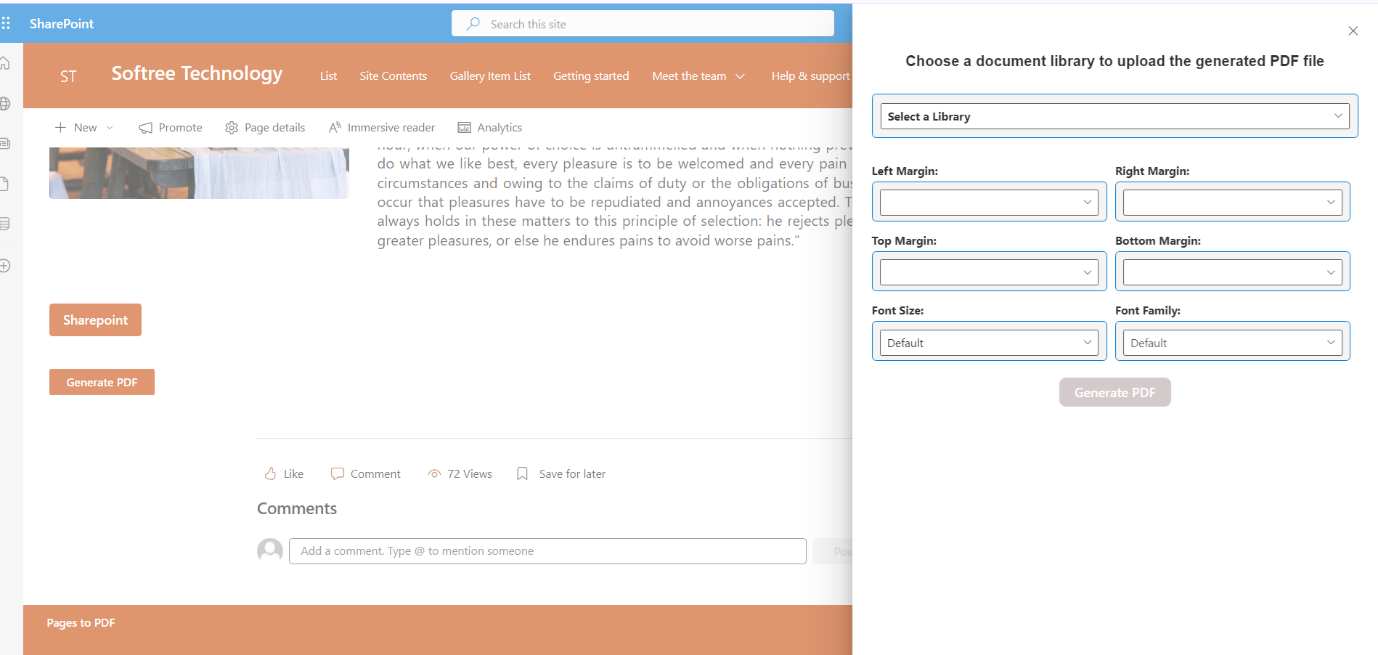
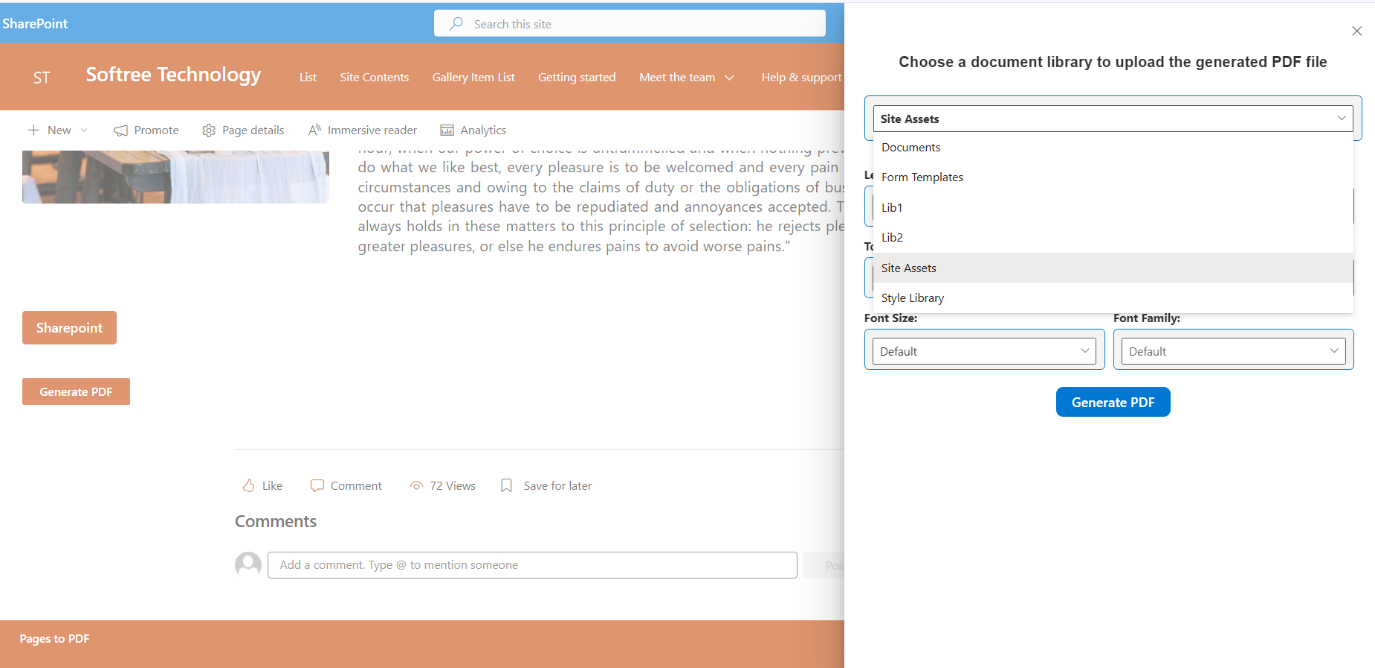
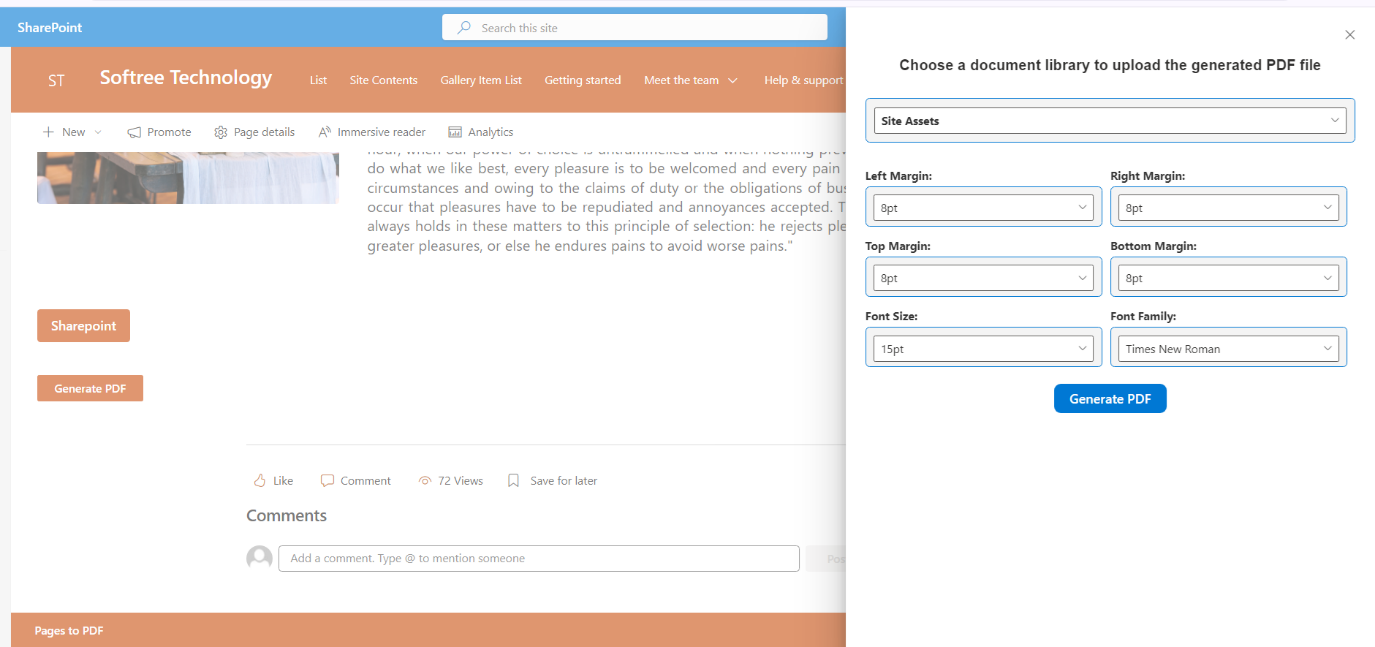
1. Margin Adjustments:
- Users can set the Left Margins, Right Margins, Top Margins, and Bottom Margins using dropdowns with values ranging from 0pt to 10pt.
2. Font Customization:
- Font Size: Users can select sizes between 10pt and 20pt or reset to the default.
- Font Family: Options include Calibri, Arial, Times New Roman, Georgia, and Courier New.
The “Generate PDF” button allows users to convert a SharePoint page into a PDF and upload it to the selected document library. However, it remains disabled until a document library is selected and there is no ongoing upload process.
The button becomes enabled only when a library is chosen and the upload is complete.
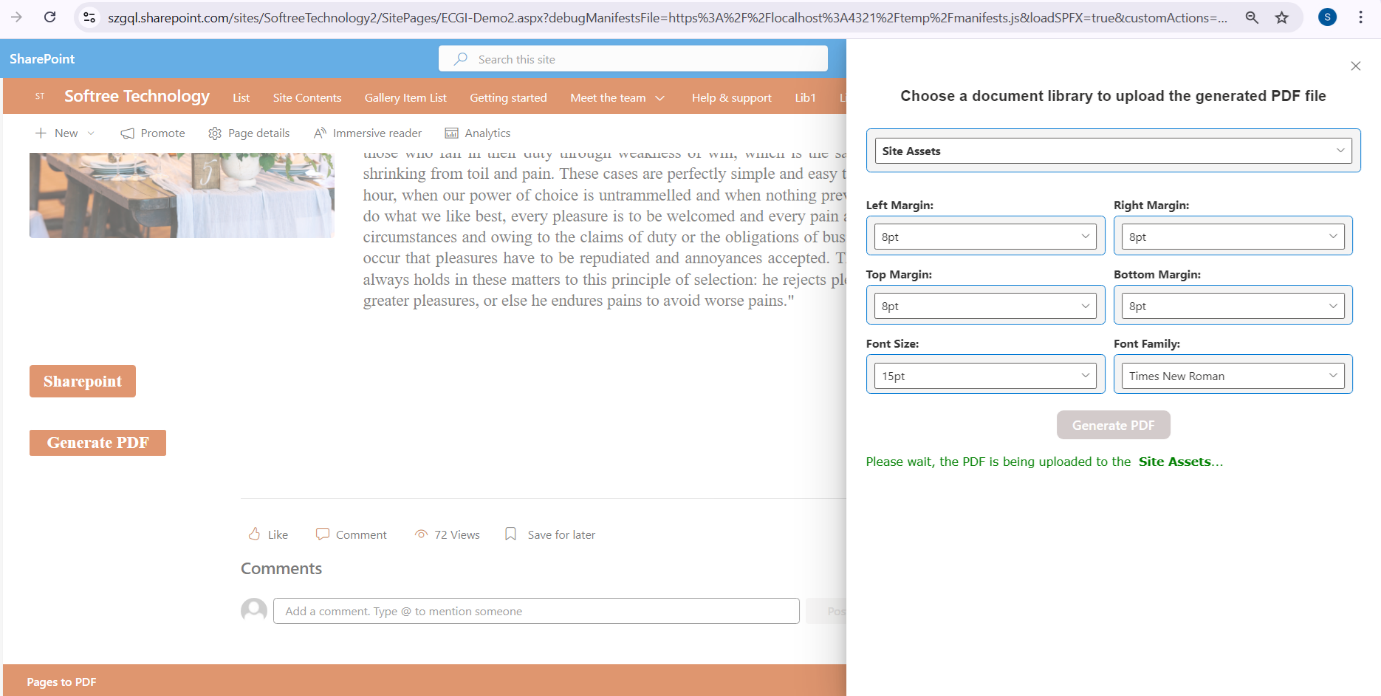
When the “Generate PDF” button is clicked, it captures the content of the current SharePoint page and converts it into a well-structured PDF document. To ensure proper formatting and readability, the function processes divider elements (with data-automation-id=”dividerPlaceholder”) within the page, which act as content segments and help determine appropriate page breaks in the final PDF. The selected margins are applied to the page layout.
The button becomes disabled and will not trigger the PDF generation if an upload is already in progress.
Once the PDF is successfully generated, it is uploaded to the specified document library in SharePoint. During this process, a message informs the user that the PDF is being generated and uploaded to the chosen library.
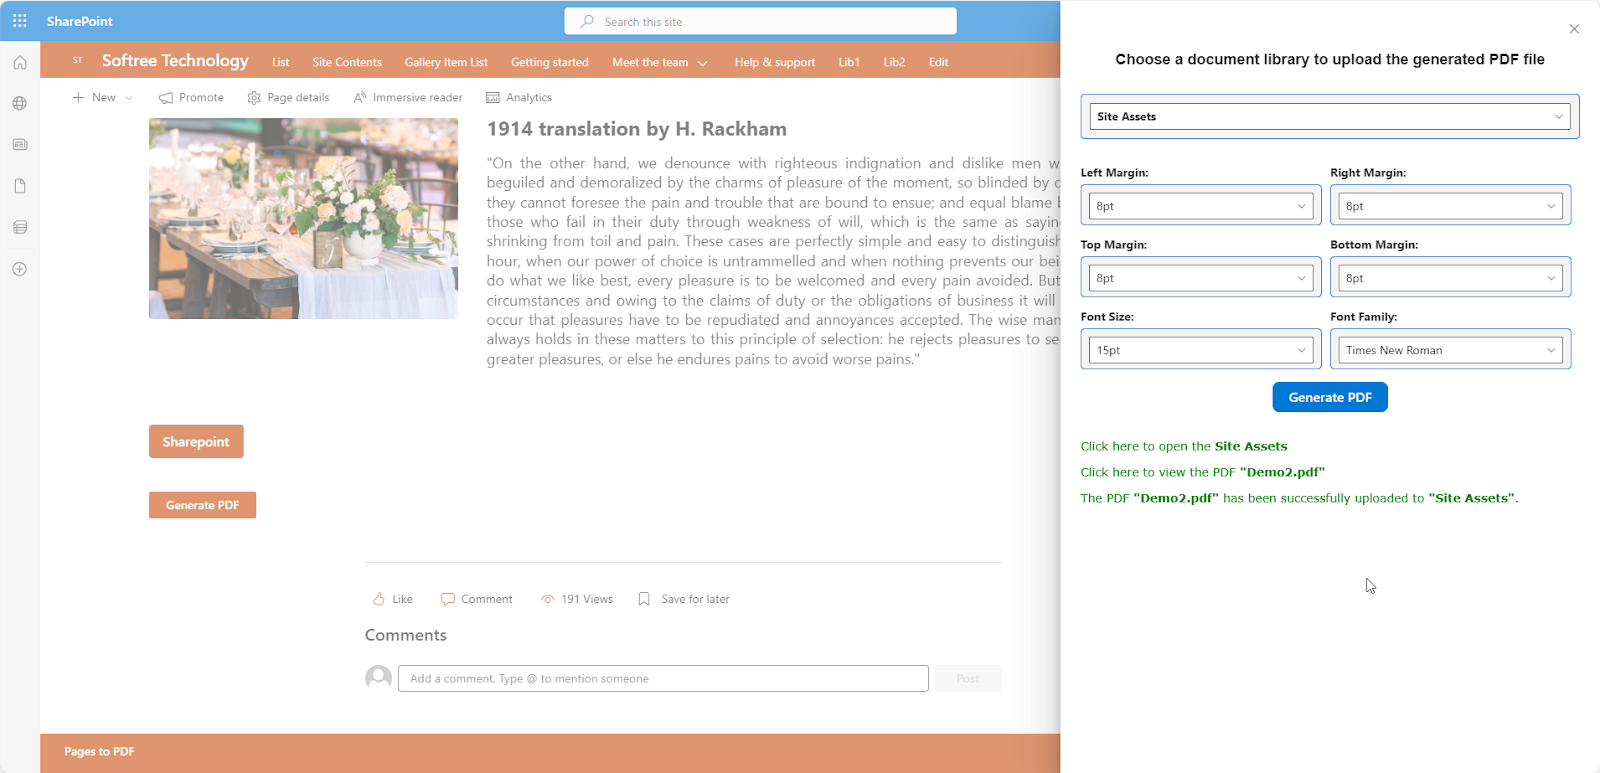
The following upload confirmation message in the screenshot informs the user that the generated PDF has been successfully uploaded to the selected SharePoint document library. The PDF is saved using the page title as its filename. It includes:
- A link to open the selected document library – Clicking this link will open the selected library in a new browser tab, allowing users to view or manage files within it.
- A link to directly view the generated PDF – This enables users to immediately access the newly created PDF file in a separate window.
- A confirmation message – It explicitly states that the PDF file, has been successfully stored in the Selected Library document library.
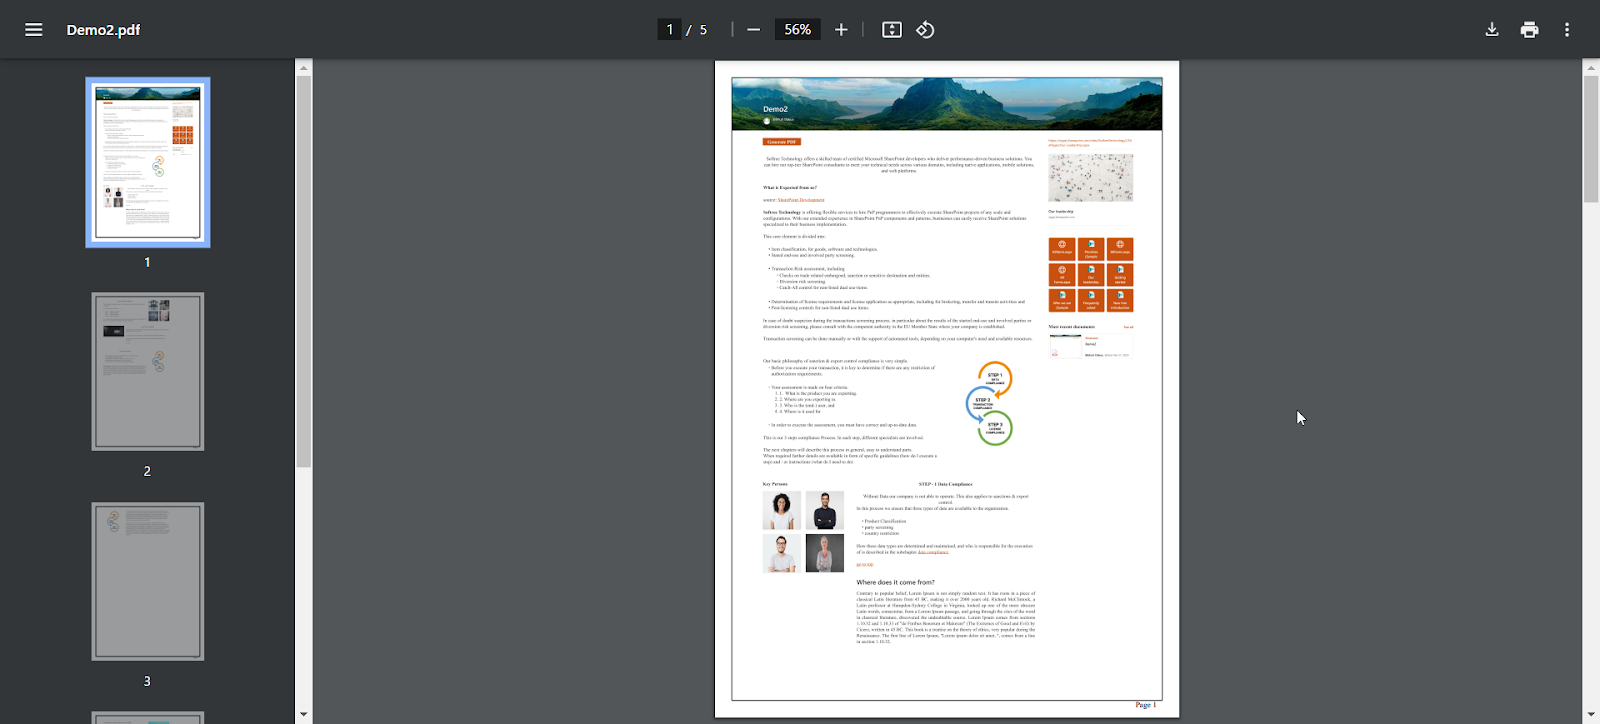
The screenshot displays the generated PDF, which features a border surrounding the entire page. Additionally, at the bottom of each page, the page number is clearly visible.