Project tracking is a crucial aspect of project management, ensuring that projects are completed on time, within budget, and to the desired quality. Here’s a point-wise explanation of how to track a project from initiation to completion:
Initiation Stage
- Create a project: This is the first step in the initiation stage, where you define the project’s scope, objectives, and deliverables.
- Determine the project’s status: At this stage, the project is in the initiation phase, and its status should reflect this.
Planning Stage
- Create tasks for the project: Once the project is created, the next step is to define the tasks required to complete the project.
- Assign resources to tasks: During the planning stage, you should assign resources (such as team members) to each task to ensure that they are completed efficiently.
Execution Stage
- Assign resources to tasks: In the execution stage, you should assign resources to tasks to ensure that they are completed efficiently.
- Monitor task progress: During the execution stage, you should monitor the progress of each task to ensure that they are completed on time and to the desired quality.
Completion Stage
- Complete the project: Once all tasks are completed, the project is considered complete.
- Review project performance: After the project is completed, you should review its performance to identify areas for improvement in future projects.
Steps
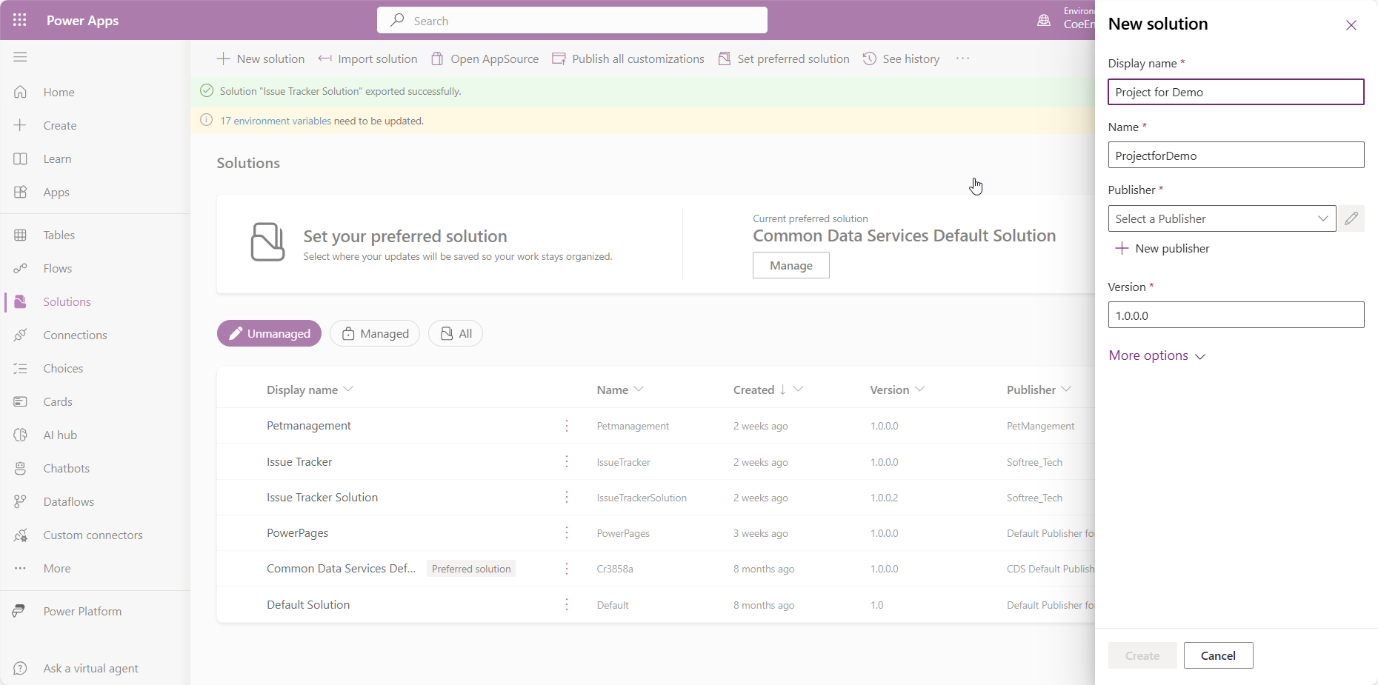
First create a solution
- In PowerApps environment go to solution and click on new solution.
Provide Display name, name, create a publisher as shown in below image
Creating solution
Creating solution publisher

Now we need to create tables
So go inside created solution, in new go to tables and create table and name it as Project Tracking

Then in tables we will rename default column name to project name.
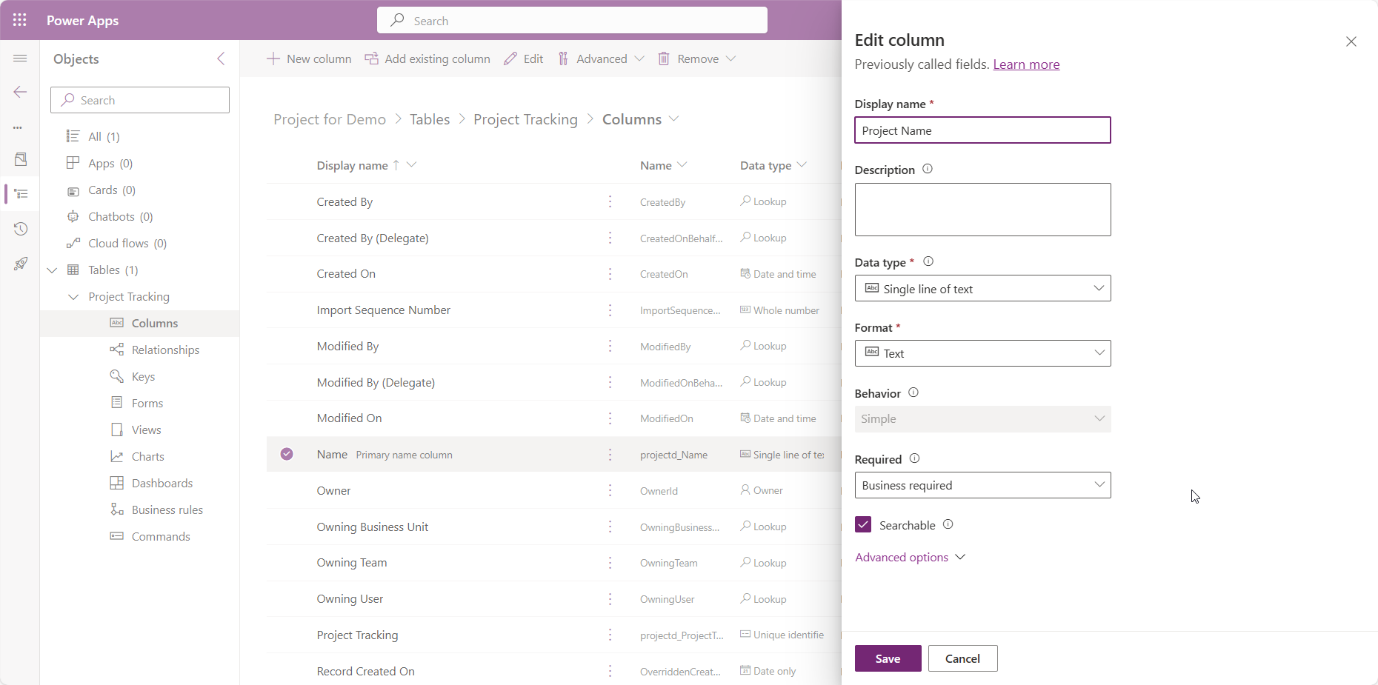
We will create few more columns
Project start date- date field
Project end date- date field
Project manager- lookup with contact table
Project status- choice field
Cost-currency

Then go to project tracking table and click on form, go to main form then edit.
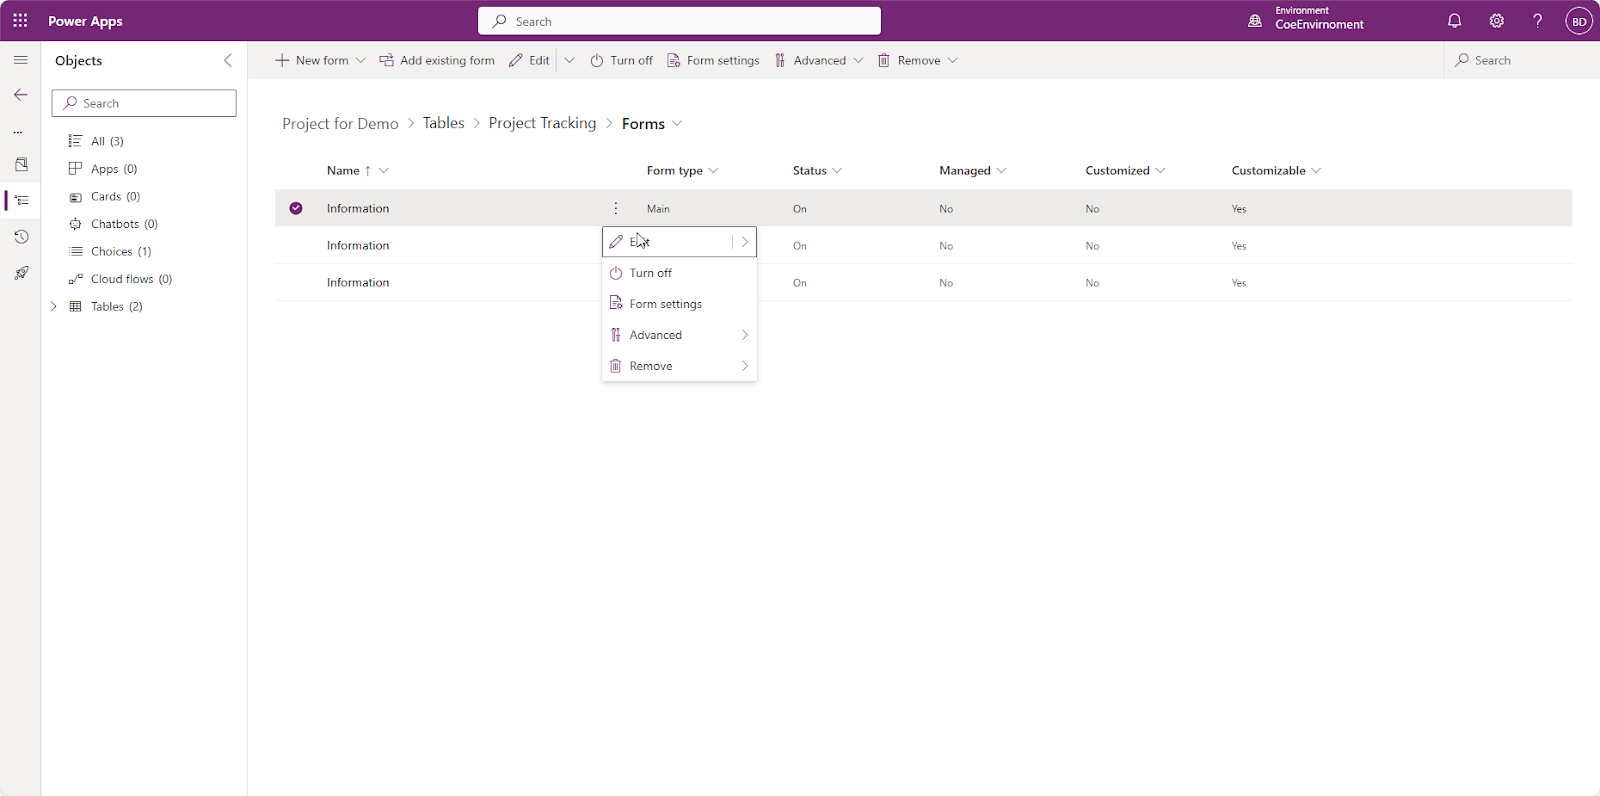
In form hide Owner column
Go to table columns and change it to custom select all created columns and arrange in the page and save.

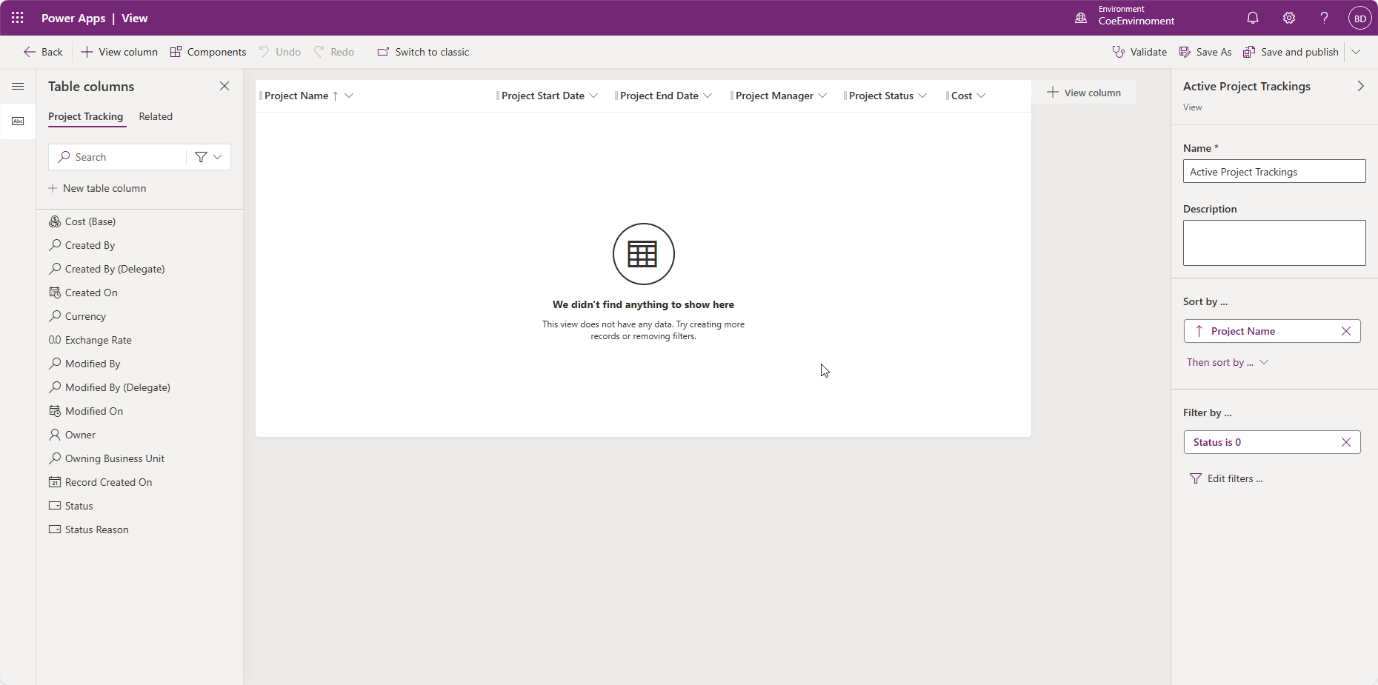
Next go to project tracking and go to view, In view select Active project tracking
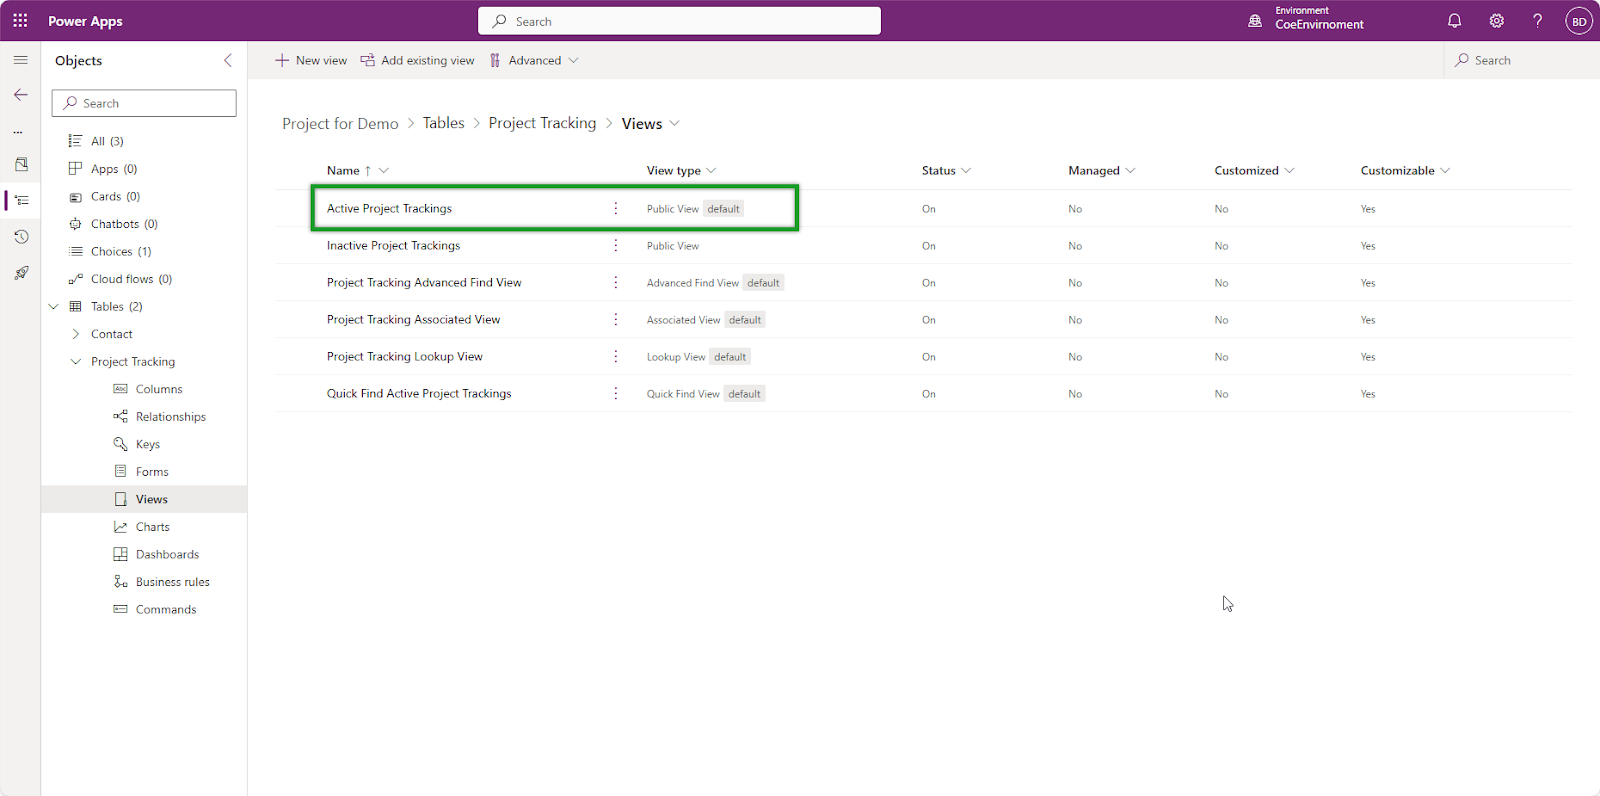
Remove created on column and in search select custom then add all custom columns (start date, project end date, status, cost etc.) then click on save.
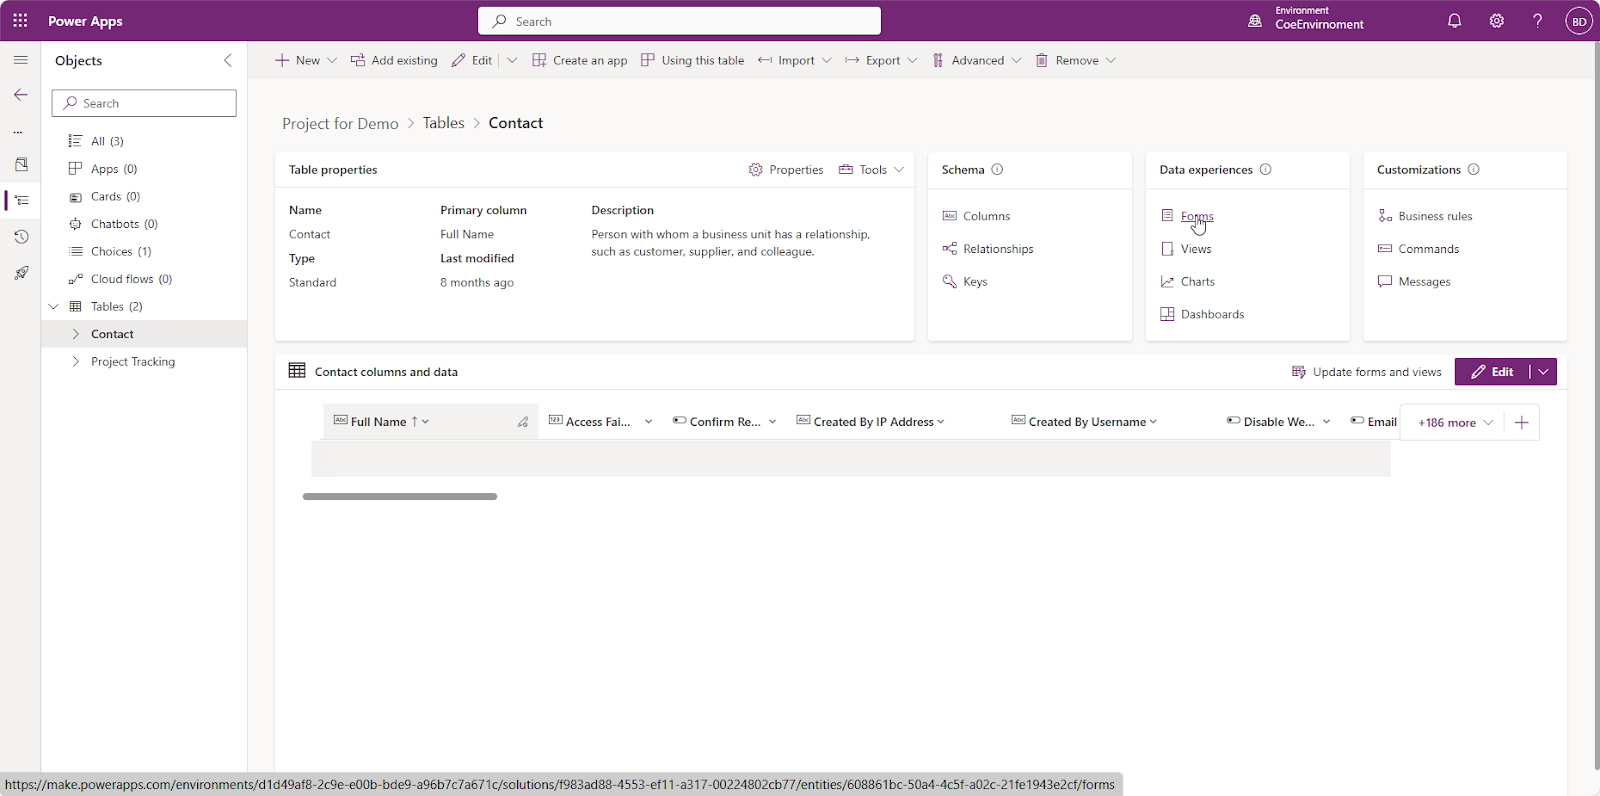
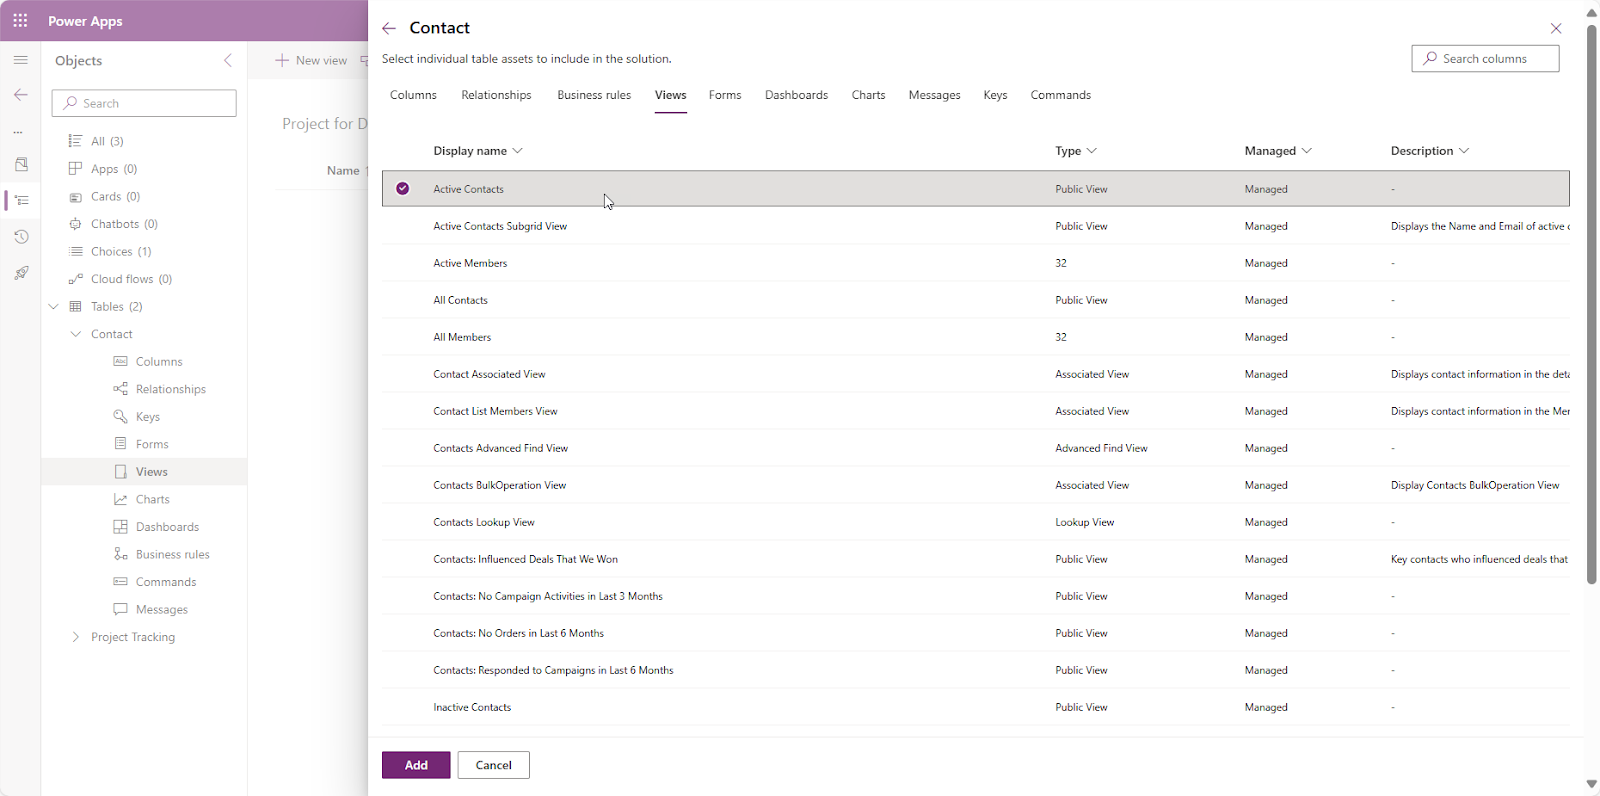
Go to contact table, open contact form.
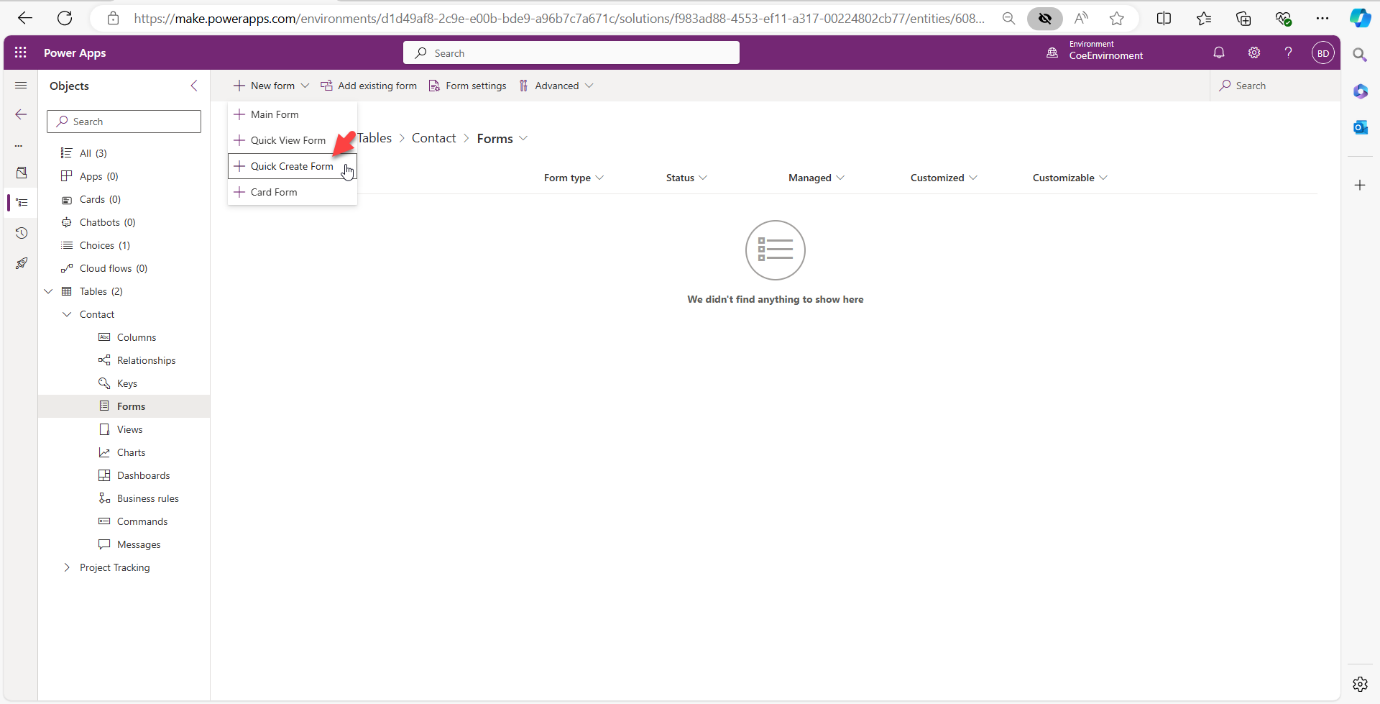
Create Quick create form
Remove/hide unnecessary new sections, choose one new section then go to table columns search bar and search name and choose First Name, Last Name, Middle Name, Email and click on save.
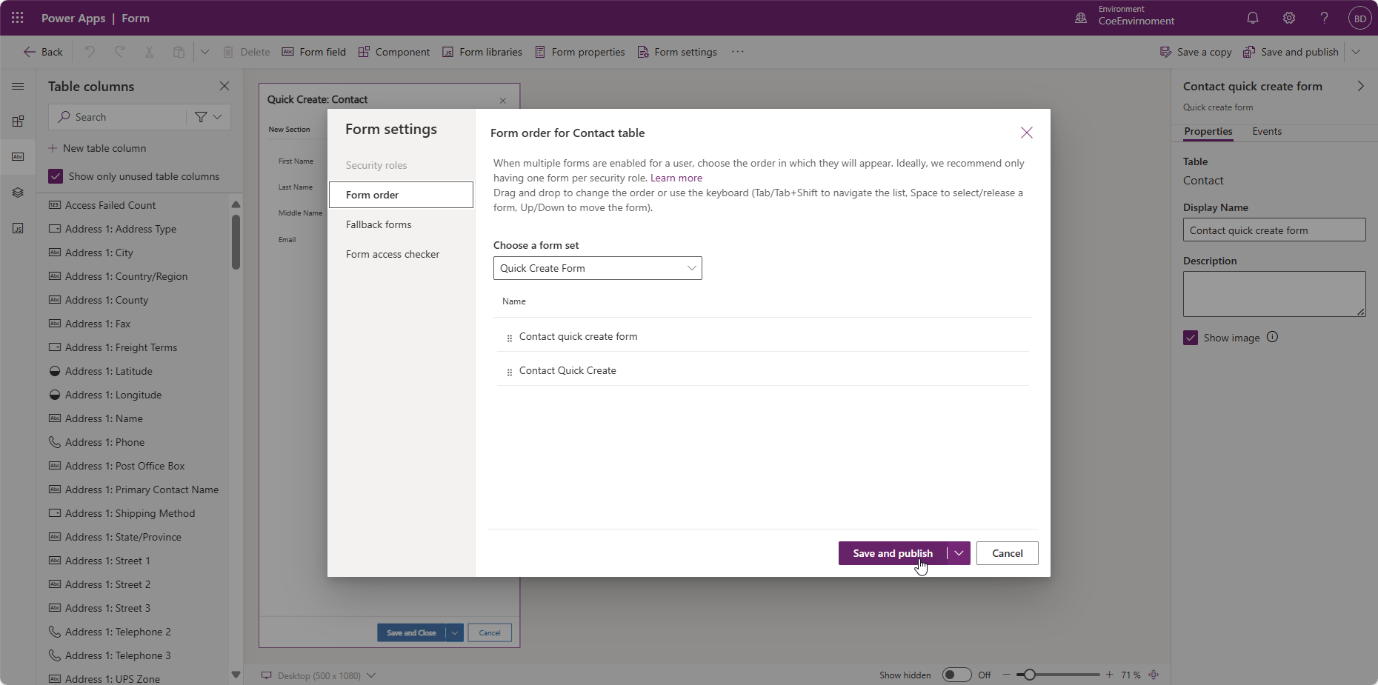
From form setting choose a form set and drag Contact quick create form to top then save and publish.
Go back and go to view.
Add existing contacts and add.
Open Add Contacts

It will show columns Full name and Email, click on save and publish.
Go to tables create another table task table and name it as Project Task.
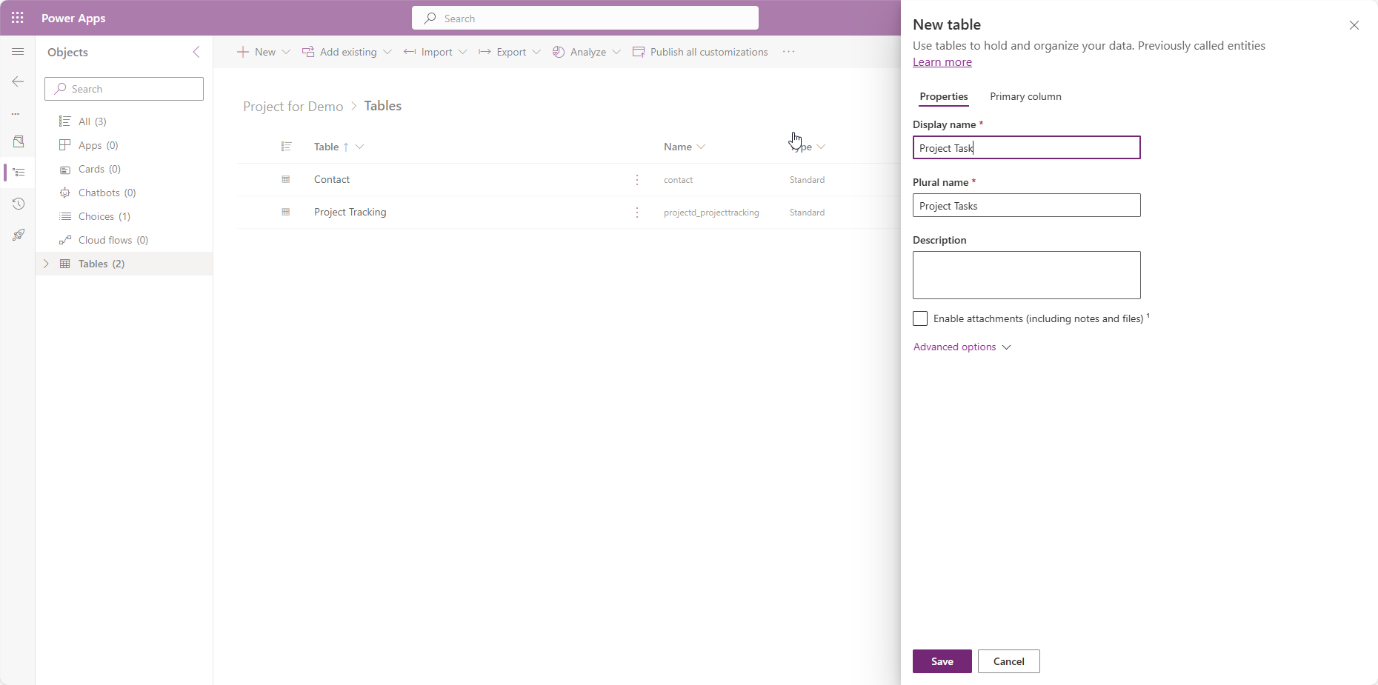
Rename the name column to Task name
Create columns
- Task Start Date- Date only.
- Task End Date- Date Only.
- Task Assigned to- lookup with Contact.
- Task Status-Choice (In Progress, Completed)
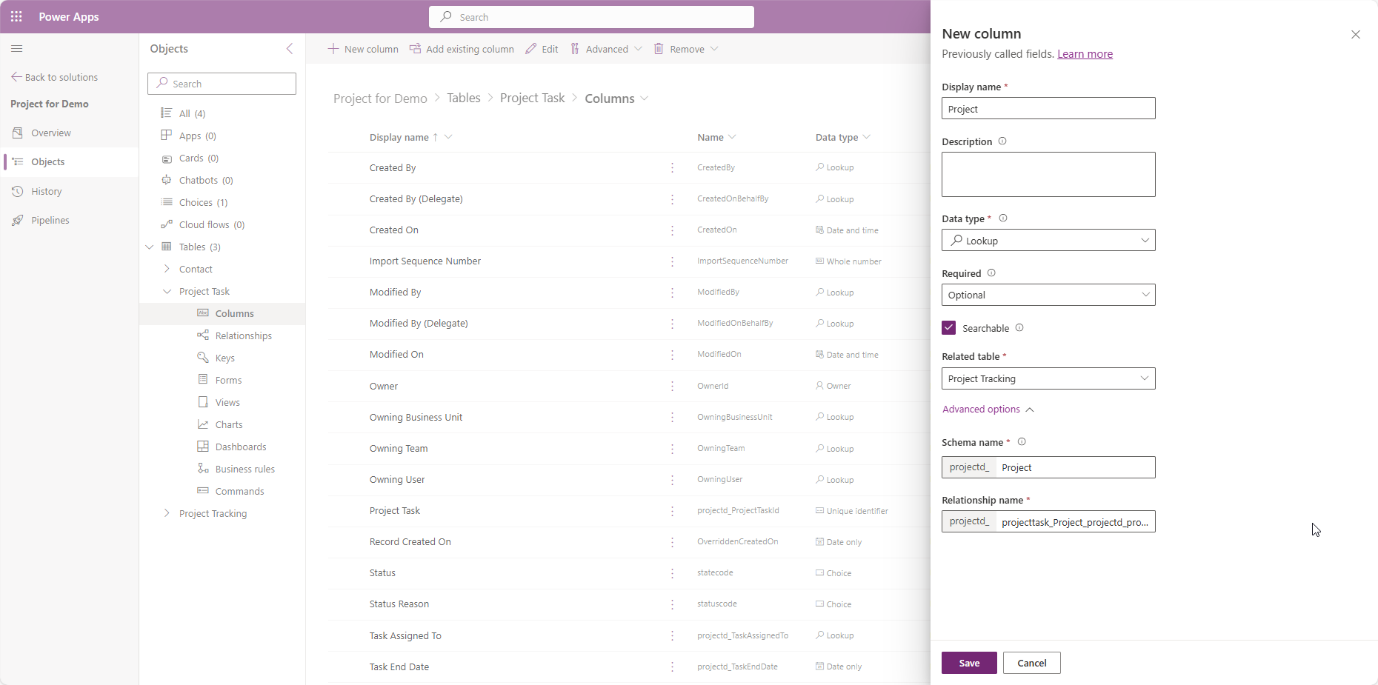
Create a relationship column Project and lookup with Project Tracking table.
It will create one to many relation that means one project can have multiple tasks.
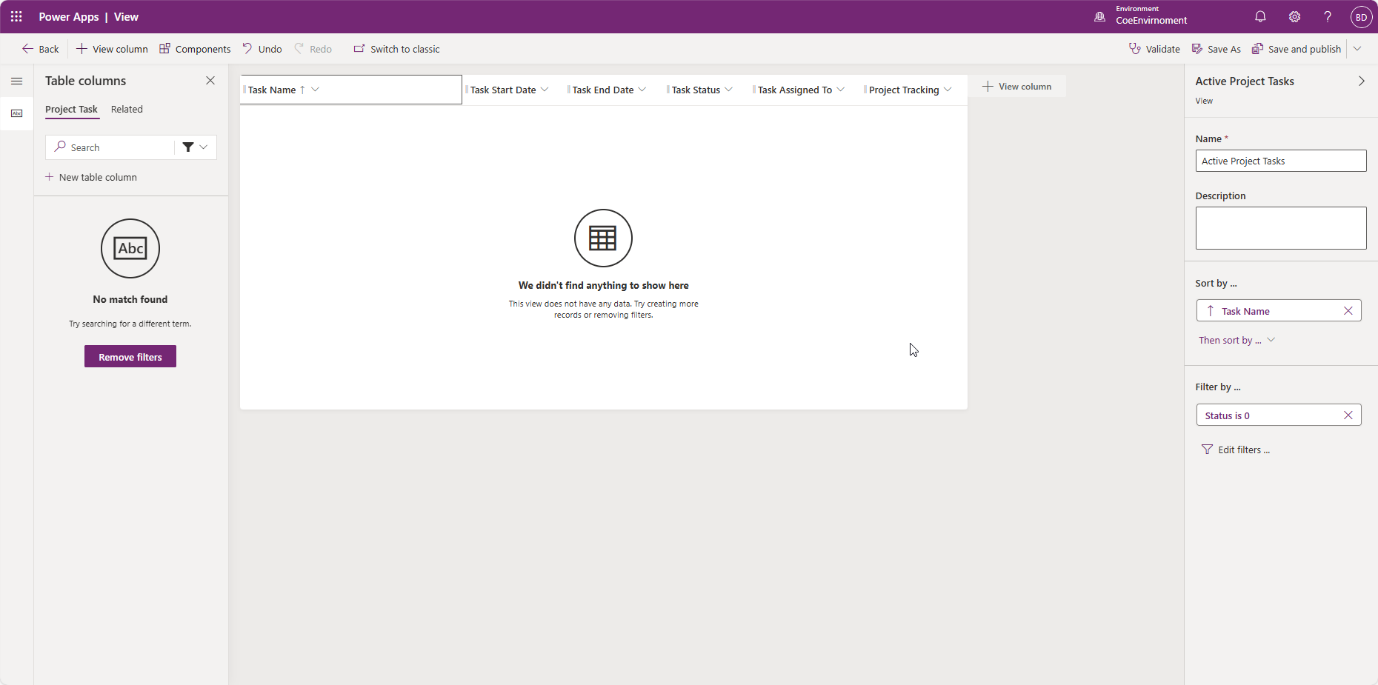
Now go to project task view, remove created on, In search change to custom and select Task Name, Task Start Date, Task End Date, Task Status, Task Assigned to, Project Tracking and save.
Now tables are ready so publish all, We need to create the app.
Go to the app and create Model Driven App
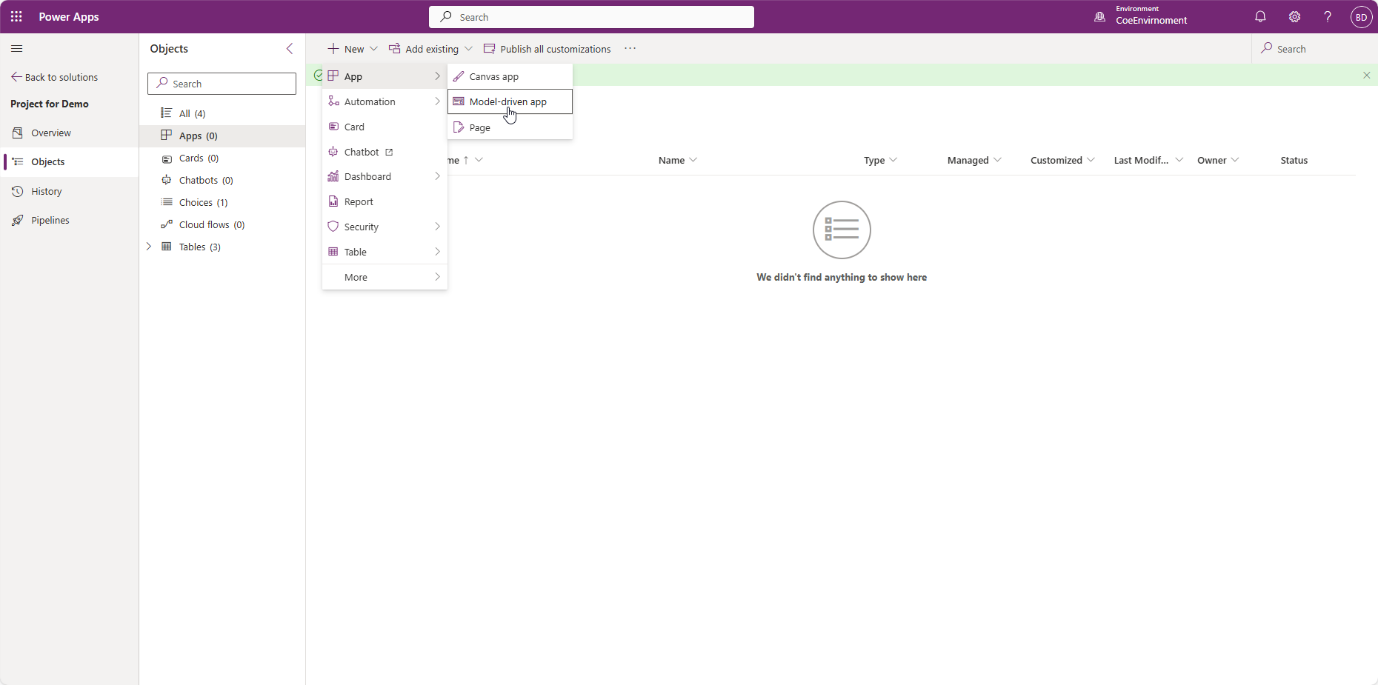
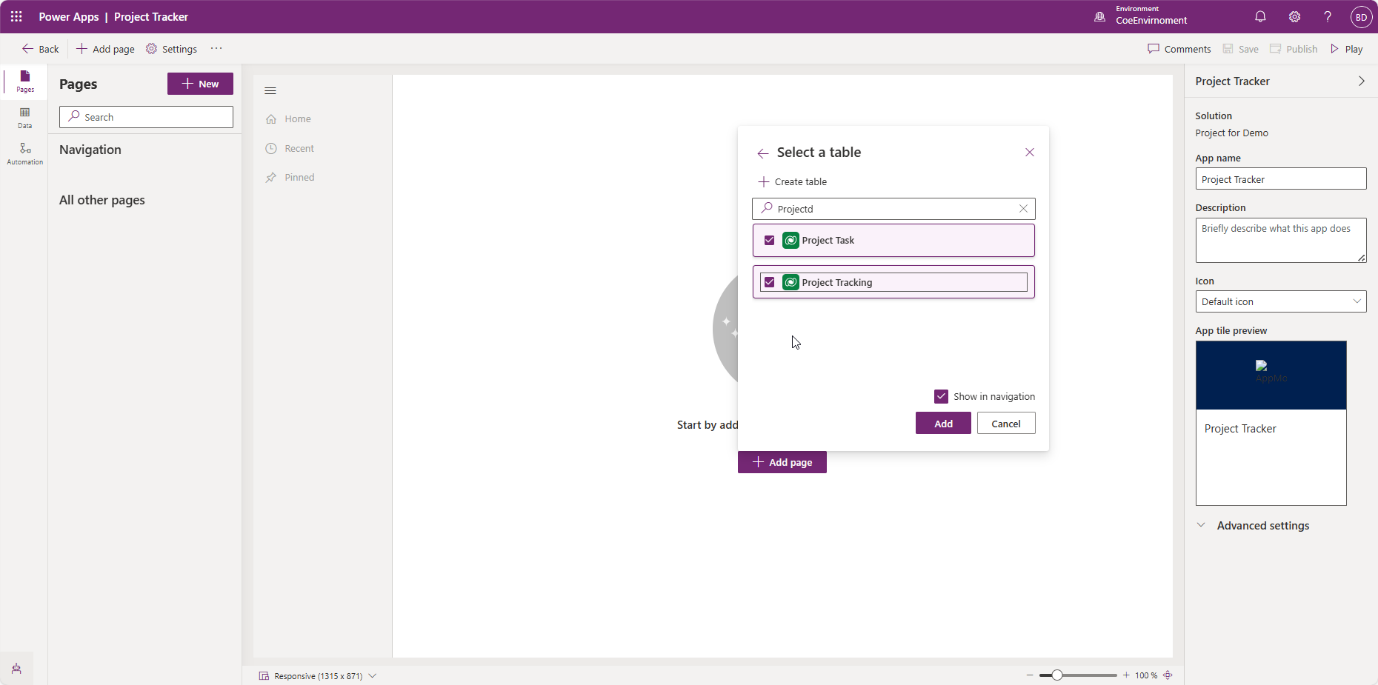
Then go to add page, New page> Dataverse tables >add Project Task, Project Tracking and contact.
Then go to project tracking, on the form choose main form, Add subgrid
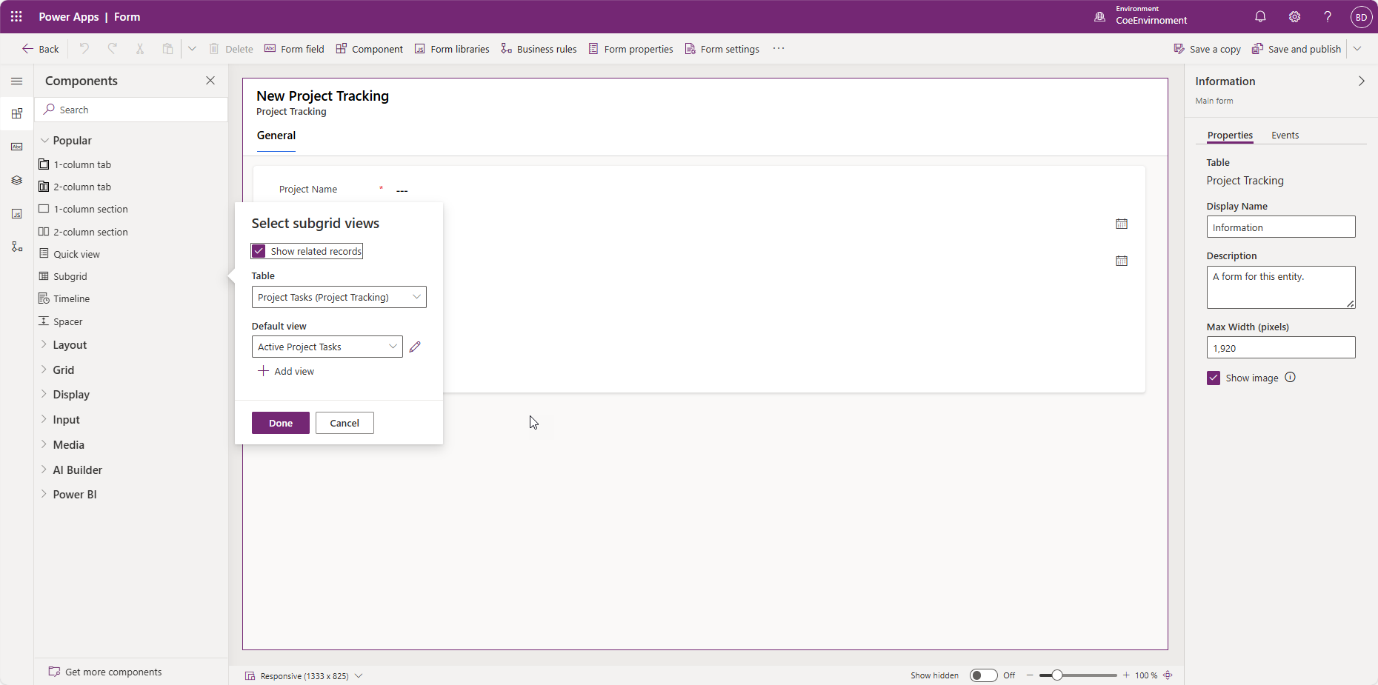
Now save and publish.
After that go to the app and play > New you can fill the form like below.

Now we need to create process flow.
For that go to solution > Cloud flow > provide name (Approval process for project) add table Project Tracking and create.
It will create like this
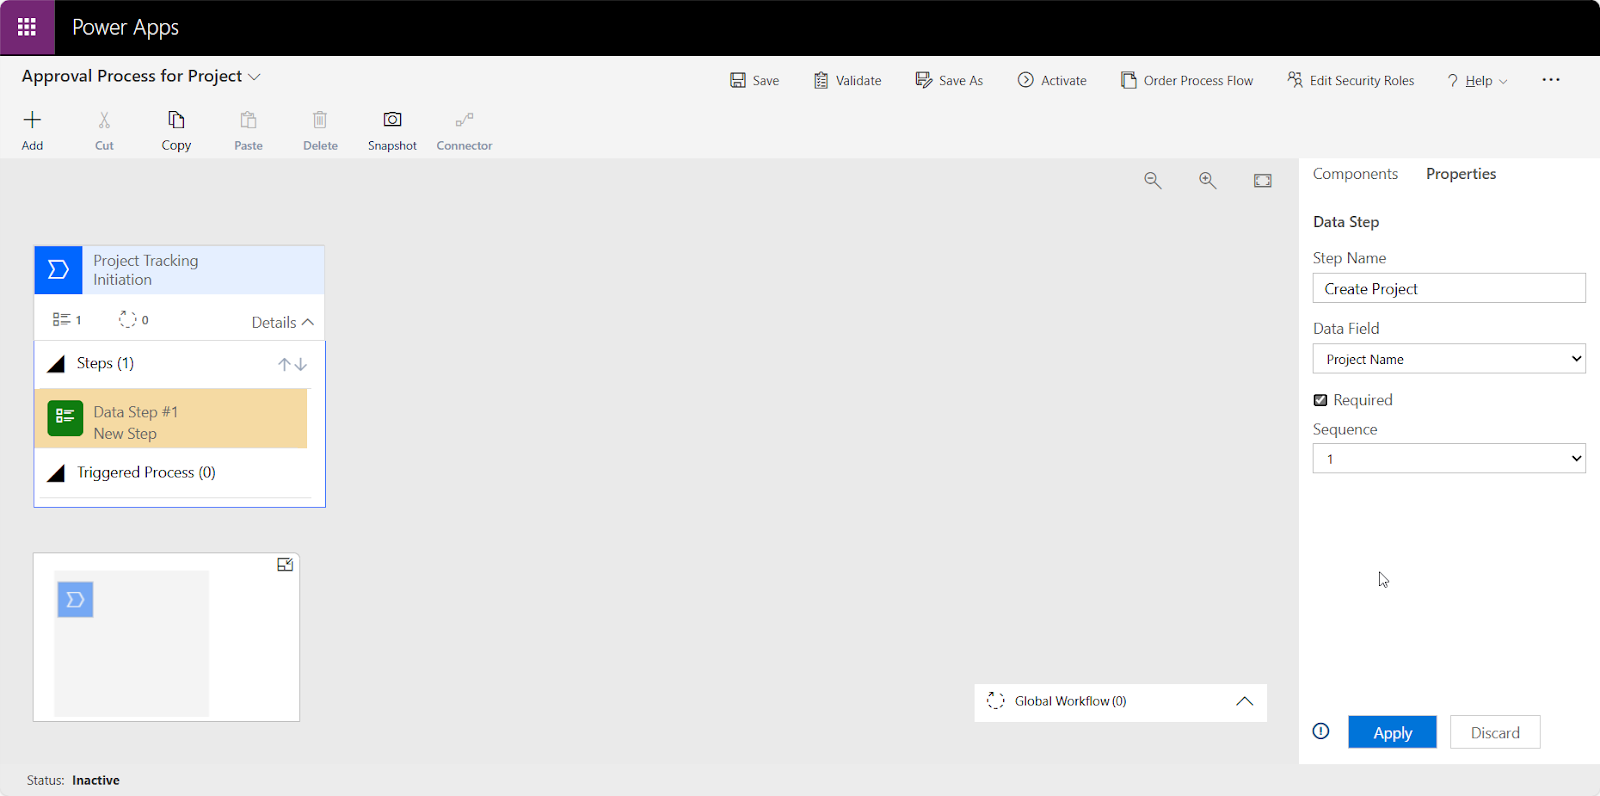
Step name – Create Project and Data field- Project Name and apply
Go to component and put a new stage or from add.
Step name- Planning , Data field- Project Task click on apply.
Go to component In data step, Step Name- Create Task and data field- Task Name.
Create new step Execution and apply.
In data step will be Assigned resource on task, data field will be Task assigned to.
Last step will be Completion, entity will be Project Tracking then click on apply.
Go to properties and step name Update project status as Finished, data field will be project status and click on apply.

Now work flow is ready and we can validate then activate, this will take time.
Now go back click on done. When we click on done automatically a processes will be created on solution.
Go to apps and publish all customizations.
Then open the app and play
Now click on new

Provide details
After saving when we click on Initiation we will get Next step suggestion.
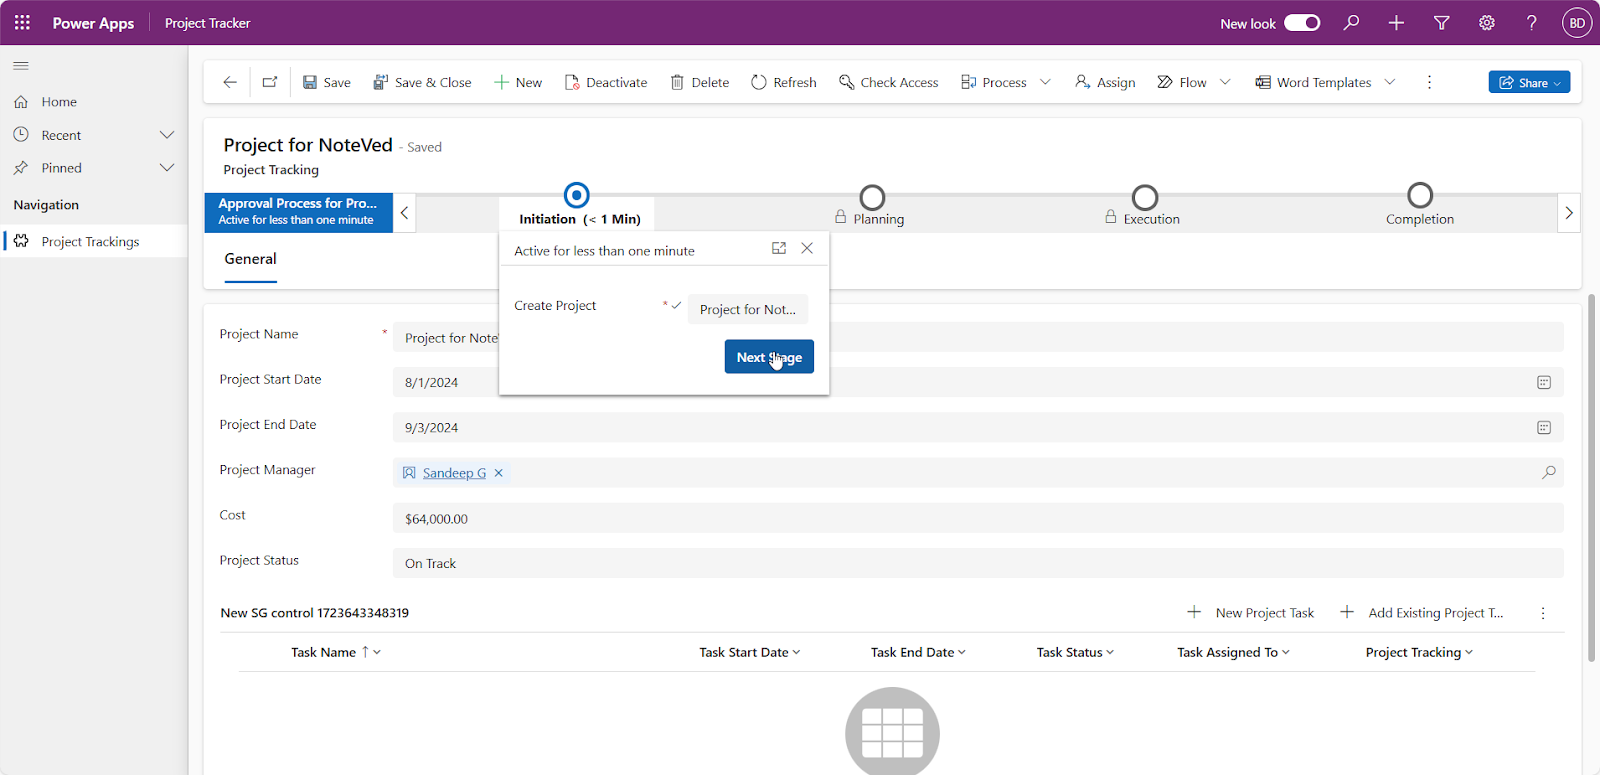
When we click on next stage it will ask create task.

Now we will create task.
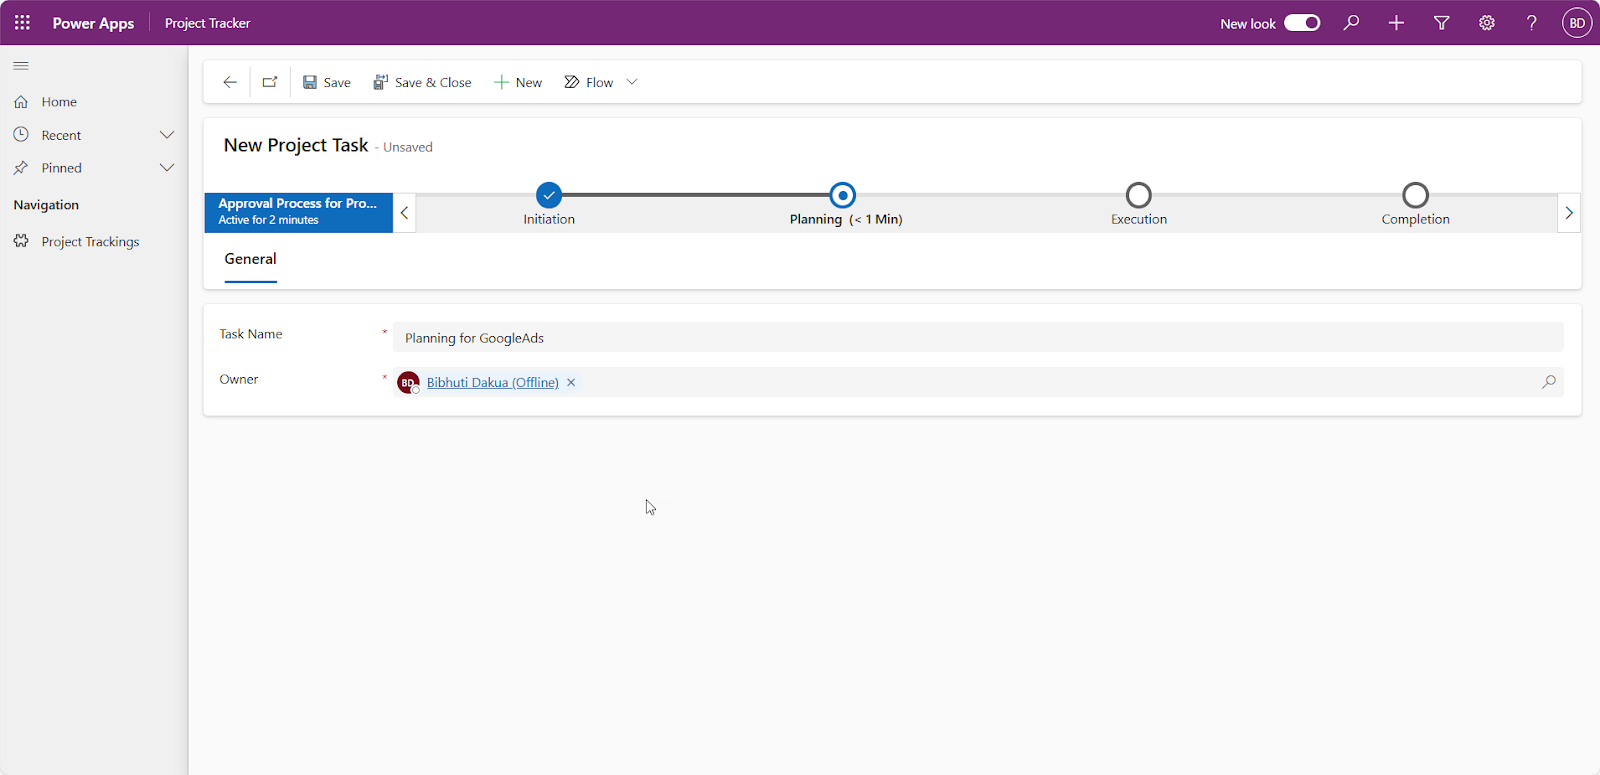
After creating task we will go to next stage.
Here we need to assign resource on task.

In the next step it is asking project status.

This is how we can create project tracker app using Model driven app.