![How to Use PowerApps Nested Gallery? [With Examples]](https://softreetechnology.com/blog/wp-content/uploads/2024/10/How-to-Use-PowerApps-Nested-Gallery.png)
You can put a gallery inside another in Power Apps using the nested gallery feature. It gives data representation a hierarchical structure that facilitates user understanding of the relationships between various data sets.
In this case study, I will describe what is Nested gallery in Power Apps and how to use PowerApps Nested gallery.
- Power Apps nested gallery with expand collapse functionality
- How to provide the dynamic height for a nested gallery in Power Apps
Nested Gallery in Power Apps
- The gallery inside the gallery is known as Nested Gallery. Here, I have a Project Management app that contains a list of projects. Within each project, a nested gallery shows the associated tasks.
- It allows users to easily view all tasks related to a project and its details by simply expanding the project title.
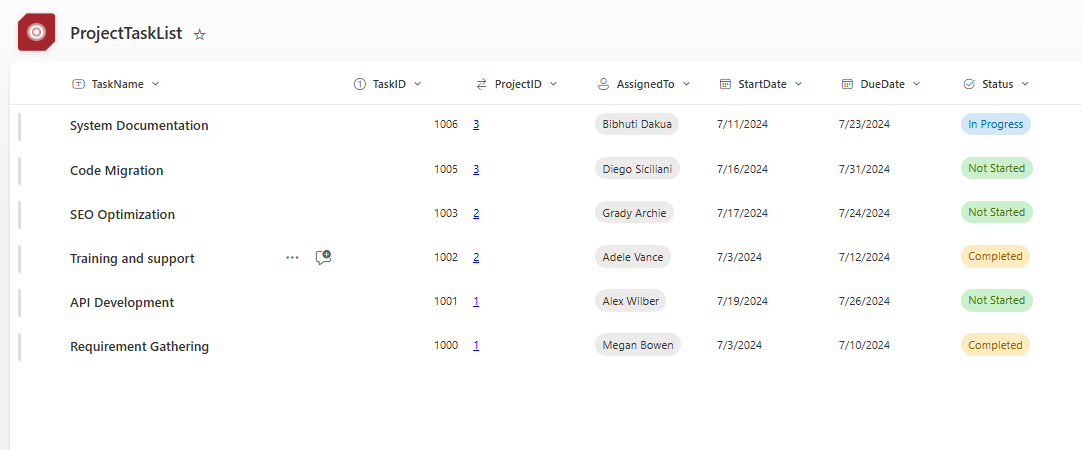
- For this application, I have taken the Datasource as a SharePoint list. It is named Project Details.
| Column Name | Data Type |
| ProjectName | Title (Single Line Text) |
| ProjectID | Number |
| ProjectManager | Person and Group |
| StartDate | Date field |
| EndDate | Date field |
| Status | Choice field (Not Started, In Progress, Completed) |
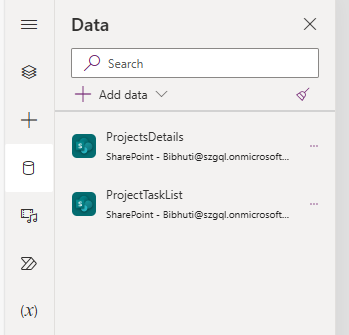
- The list below contains tasks related to each project, mentioned in previous lists, with the help lookup column [ProjectID].
Refer to the table below, which contains columns and data types for the SharePoint list.
| Column Name | Data Type |
| TaskName | Title(Single line text) |
| TaskID | Number |
| ProjectID | Lookup |
| AssignedTo | Person and group |
| StartDate | Date field |
| DueDate | Date field |
| Status | Choice (In Progress, Not Started, Completed) |
Power Apps Nested Gallery with Expand and Collapse Functionality
Let’s begin implementing Power Apps nested gallery with the expand and collapse functionality. Follow the steps below.
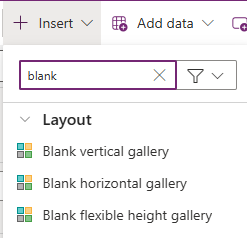
- In Power Apps, create a blank canvas app -> Connect it with the two SharePoint mentioned above lists.
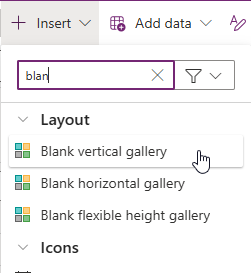
- Insert a Blank Flexible Height gallery and rename it ProjectGallery.
- Provide the SharePoint list name in the Items property of the gallery.
Items: ProjectsDetails
- Select the gallery and insert a label to display the project names.

- Now, we’ll add another gallery to display the tasks related to each project.
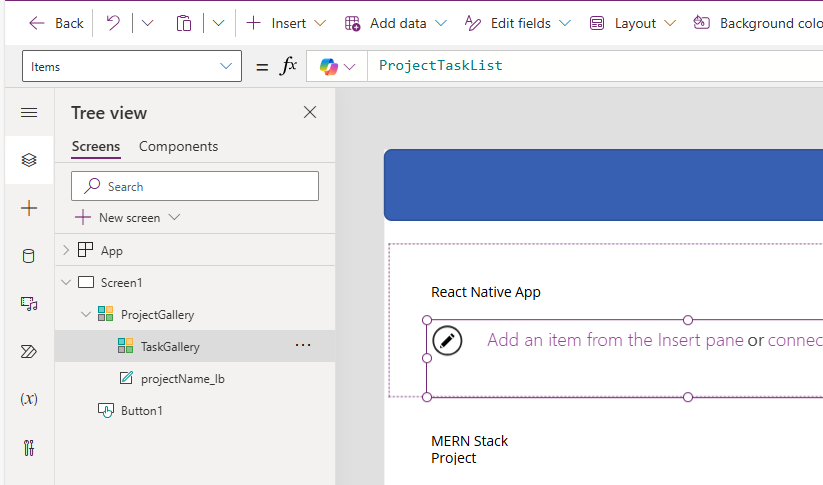
- Select the ProjectsGallery, add a BlankVertical gallery, and rename it Task Gallery.
Then, provide another SharePoint list name as a data source for the task gallery in its Items property.
- Add a text label to display the project ID in ProjectsGallery. In its Text property, provide the formula below.
ThisItem.’Project ID’
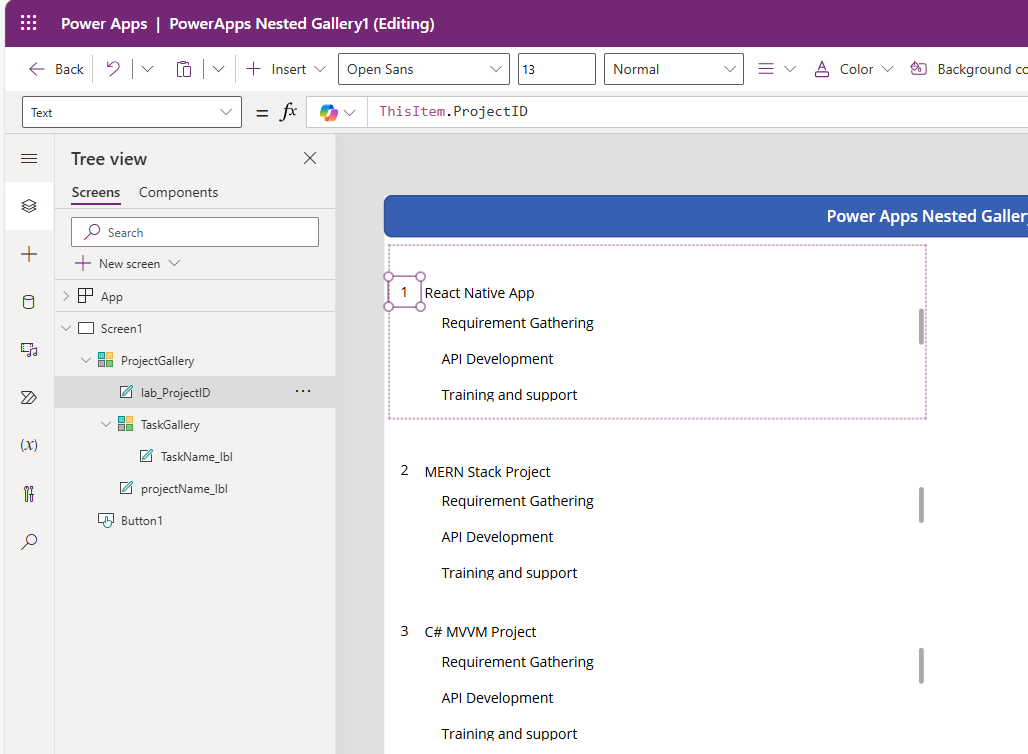
- Insert a Text label in the TaskGallery to display the task names.
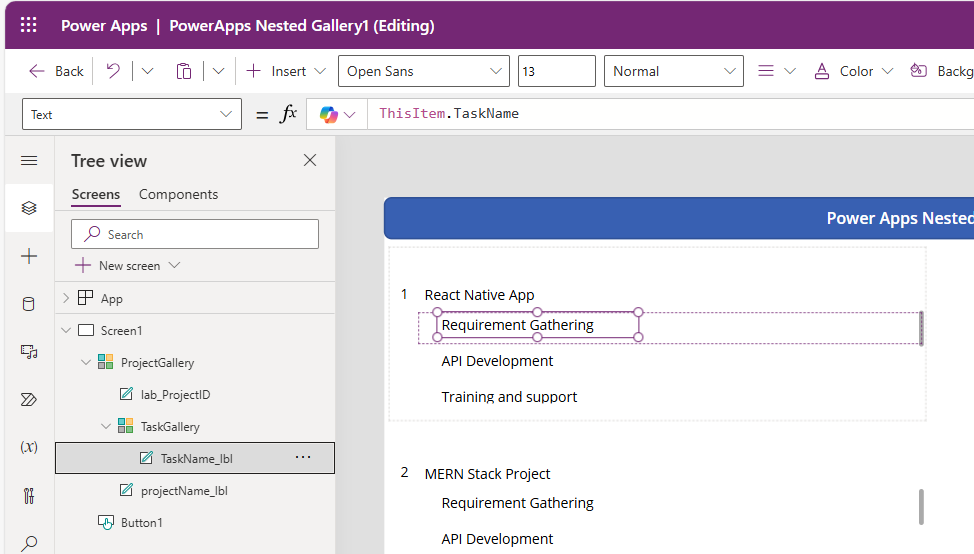
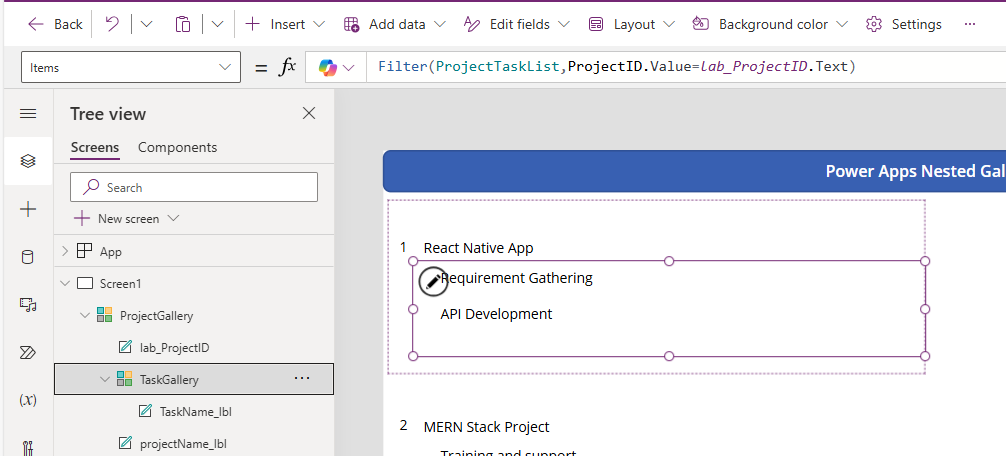
- Apply the Filter formula on the Items property of the TaskGallery. So, related task names for each project will be displayed.
Filter(ProjectTaskList,ProjectID.Value=lab_ProjectID.Text)
- Now, add up and down icons for the ProjectsGallery, as shown below. Then, give those icons a name like in below

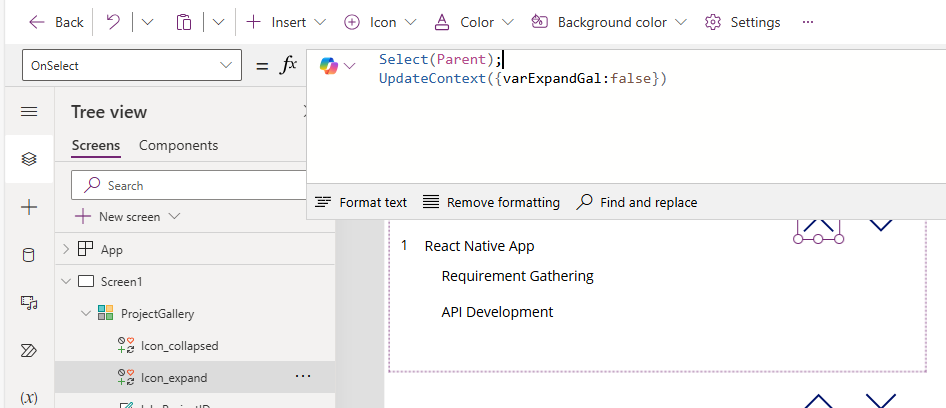
- Then, provide the formulas below in the OnSelect property of up and down icons.
Icon_expand:
Select(Parent);
UpdateContext({varExpandGal:false})
Icon_collapse:
Select(Parent);
UpdateContext({varExpandGal:true});
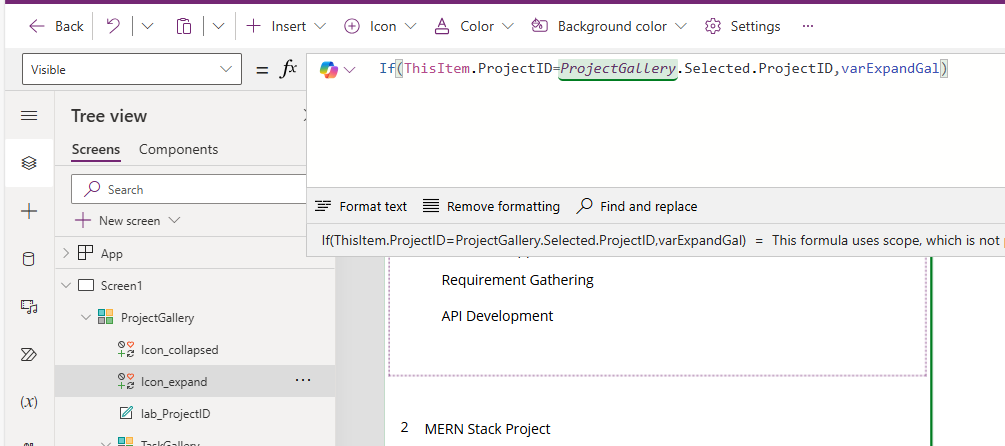
- Provide the below formula in the Visible property of the icon_expand.
If(ThisItem.ProjectID=ProjectGallery.Selected.ProjectID,varExpandGal) - The varExpandGal variable contains a false value by default for the expand icon. This formula makes the icon visible and invisible when the current project ID matches the project ID in the “ProjectsGallery”.
- Provide the formula below in the Visible property of the Icon_collapse.
If(ThisItem.ProjectID=ProjectGallery.Selected.ProjectID,!varExpandGal,true)

- This formula makes the collapse icon invisible. when we click on the expand icon. So, the varExpandGal variable value will change according to the icon we click.
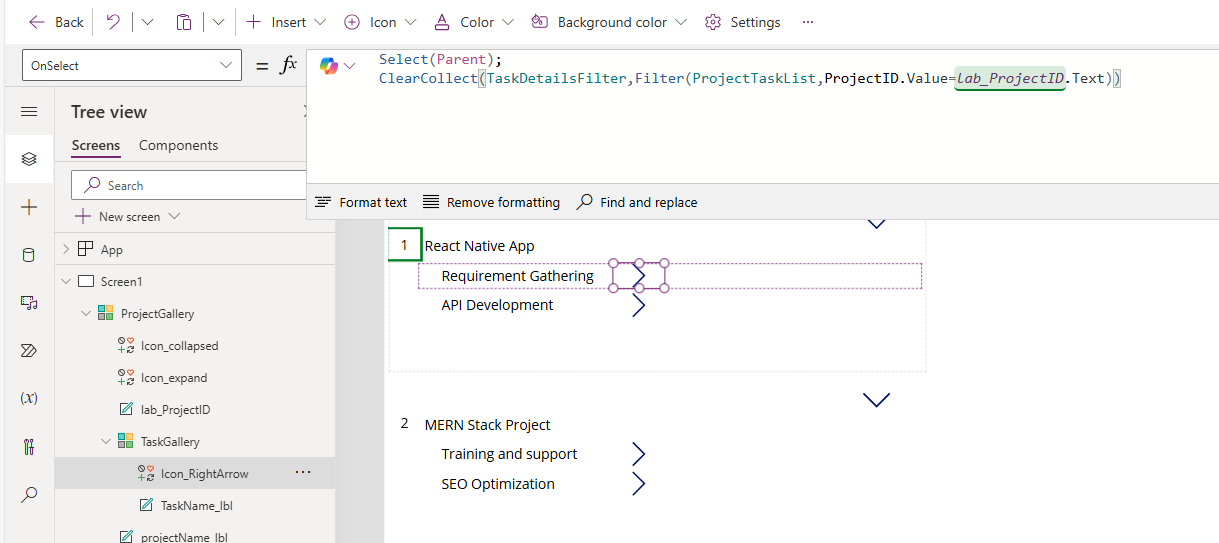
- Now add the Right icon to the TaskGallery. Then, provide the formula below in its OnSelect property.
Select(Parent);
ClearCollect(TaskDetailsFilter,Filter(ProjectTaskList,ProjectID.Value=lab_ProjectID.Text))
- Here, Select(Parent) is the default formula, and ClearCollect creates a collection that stores the selected project ID task details.
- Now, Provide the formula below in the Height property of the TaskGallery.
If(ThisItem.ProjectID=ProjectGallery.Selected.ProjectID,170,0)
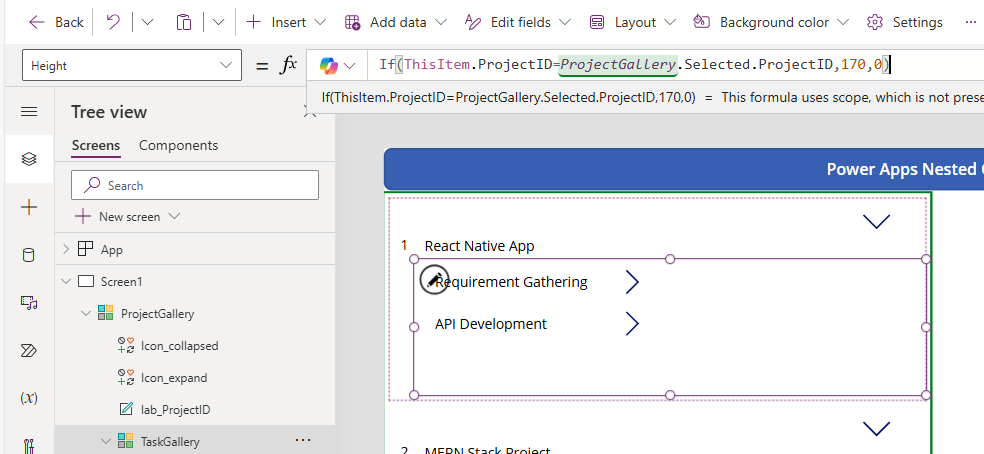
- This formula will change the height of the nested gallery when we click on the expand and collapse icons.
- We already used the above If condition on the visible property of those two icons. So, when we click on the expand icon, the nested gallery height will increase to 170, which will reduce to 0 when we click the collapse icon.
- To display the details of the selected task, insert one Data table control. Then, in its Items property, provide the collection name that we created before.
Items : TaskDetailsFilter - To add the fields to that data table, click on Fields ->+Add field ->Select field names -> Add button.

- Now, save the changes and publish it once. While previewing, you can see the expand icon will expand the nested gallery, and the collapse icon will hide the nested gallery.
- The selected task details will be displayed on the data table control.

- This way, we can build a nested gallery with an expand-and-collapse feature and display the selected task details.